EMBOSSER DIE MANUFACTURING
How to Make Embosser Dies with a CO₂ Laser
A CO₂ laser can be used to produce matched male and female POM dies for handheld and heavy-duty embossers. At XLH Laser, the workflow combines digital artwork preparation, laser engraving and cutting, die alignment, installation and final embossing verification in one practical production process.
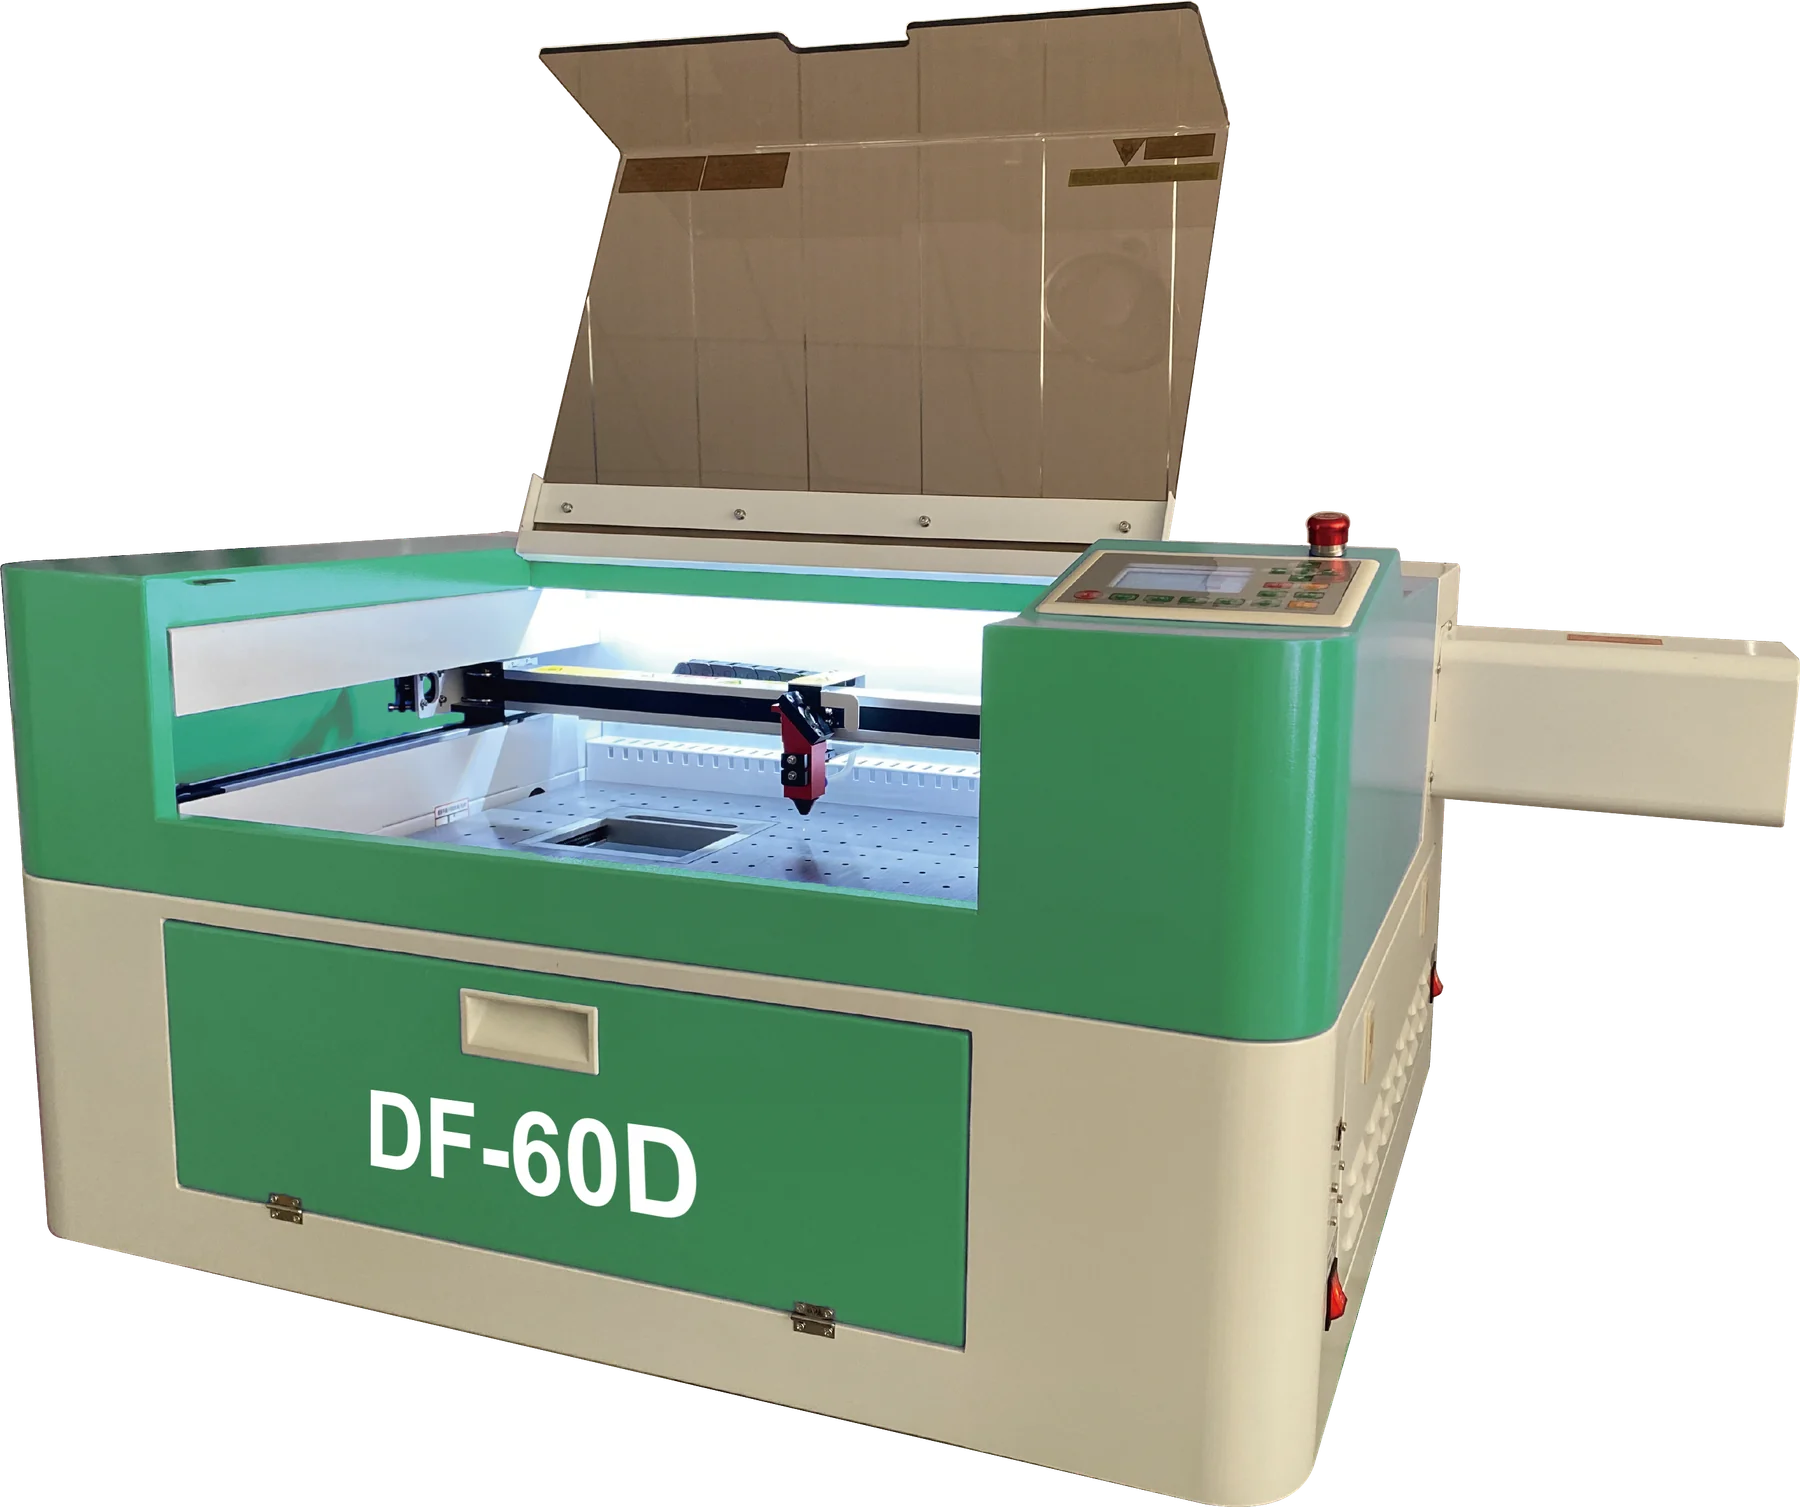
Using the DF60D CO₂ Laser, POM die material can be processed into custom round or rectangular die sets for personalized embossers, book embossers and related stamp-production applications.
In one demonstrated die-production workflow, engraving and cutting of one matched die set were completed in approximately 3 minutes 35 seconds. Actual production time varies with artwork, die size and processing requirements.
PRODUCTION SYSTEM
What You Need for Embosser Die Production
A complete embosser die workflow involves more than the laser machine alone. The equipment, die material, artwork preparation and embosser hardware must work together as one production system.
DF60D CO₂ Laser
Used to engrave the die relief and cut the finished die outline from the POM sheet.
POM Die Material
POM is used to produce matched male and female embossing dies for custom embosser applications.
Artwork + LightBurn
Most jobs begin with a black-and-white customer image. The artwork is prepared in LightBurn before the male and female die geometry is produced.
Embosser Hardware
After processing and alignment, the finished die pair is installed into the handheld or heavy-duty embosser and tested on the intended material.
DIE MATERIAL
POM Die Material for Embosser Production
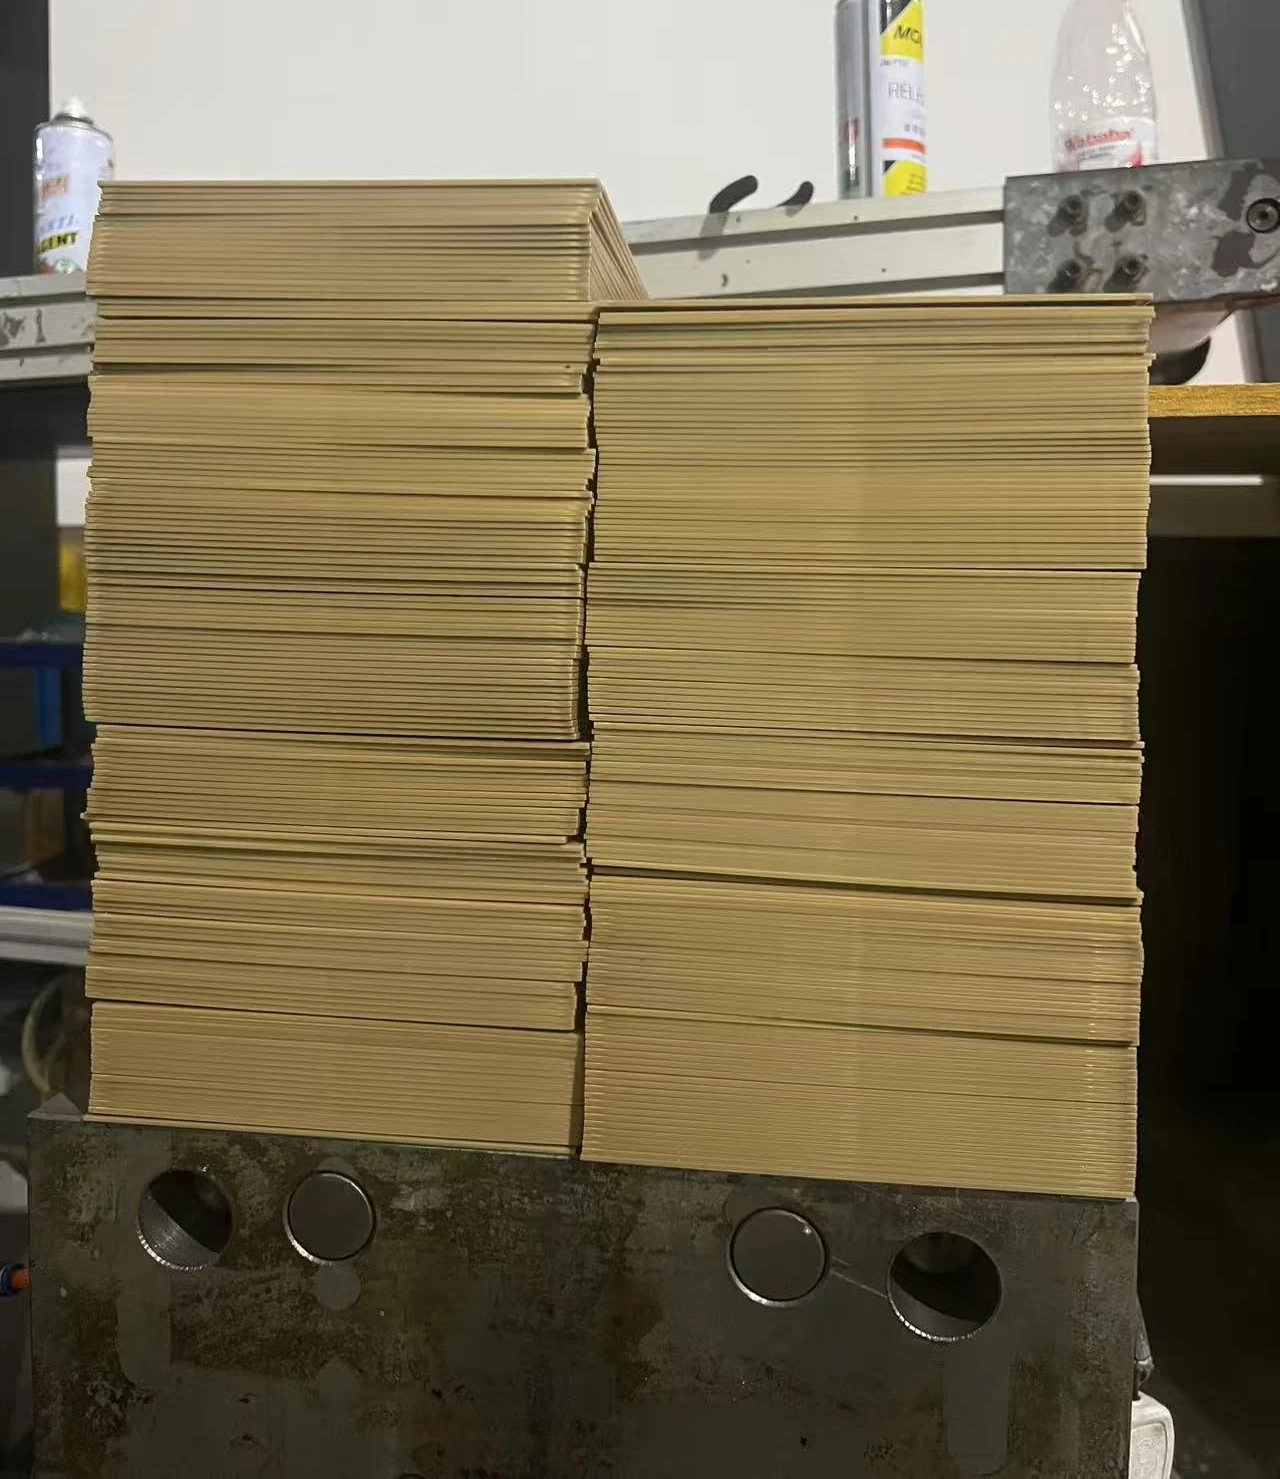
XLH Laser uses gold-colored POM sheets as part of its embosser die production workflow. The material is supplied in a format suitable for laser processing and for producing matched male and female die sets.
The standard POM sheet format used in this workflow is 210 × 170 mm. Different material thicknesses can be selected according to the embosser configuration. In our current production system, 1.7 mm POM is commonly used for handheld embossers, while 2.0 mm POM is used for heavier-duty embosser applications.
The important point is not the sheet alone. The material is integrated with the laser process, die design, alignment method and final embosser assembly.
FROM ARTWORK TO VERIFIED OUTPUT
Step-by-Step Embosser Die Workflow
A connected six-step process turns customer artwork into a matched, installed and tested POM die set.
Step 1 — Prepare the Artwork
Most custom jobs begin with a black-and-white image supplied by the customer. The artwork is prepared in LightBurn according to the required embosser format.
During preparation, the male and female die elements are arranged as a matched set. A reference notch can also be added to the die outline so that orientation is easy to identify during assembly.
Step 2 — Laser Process the POM
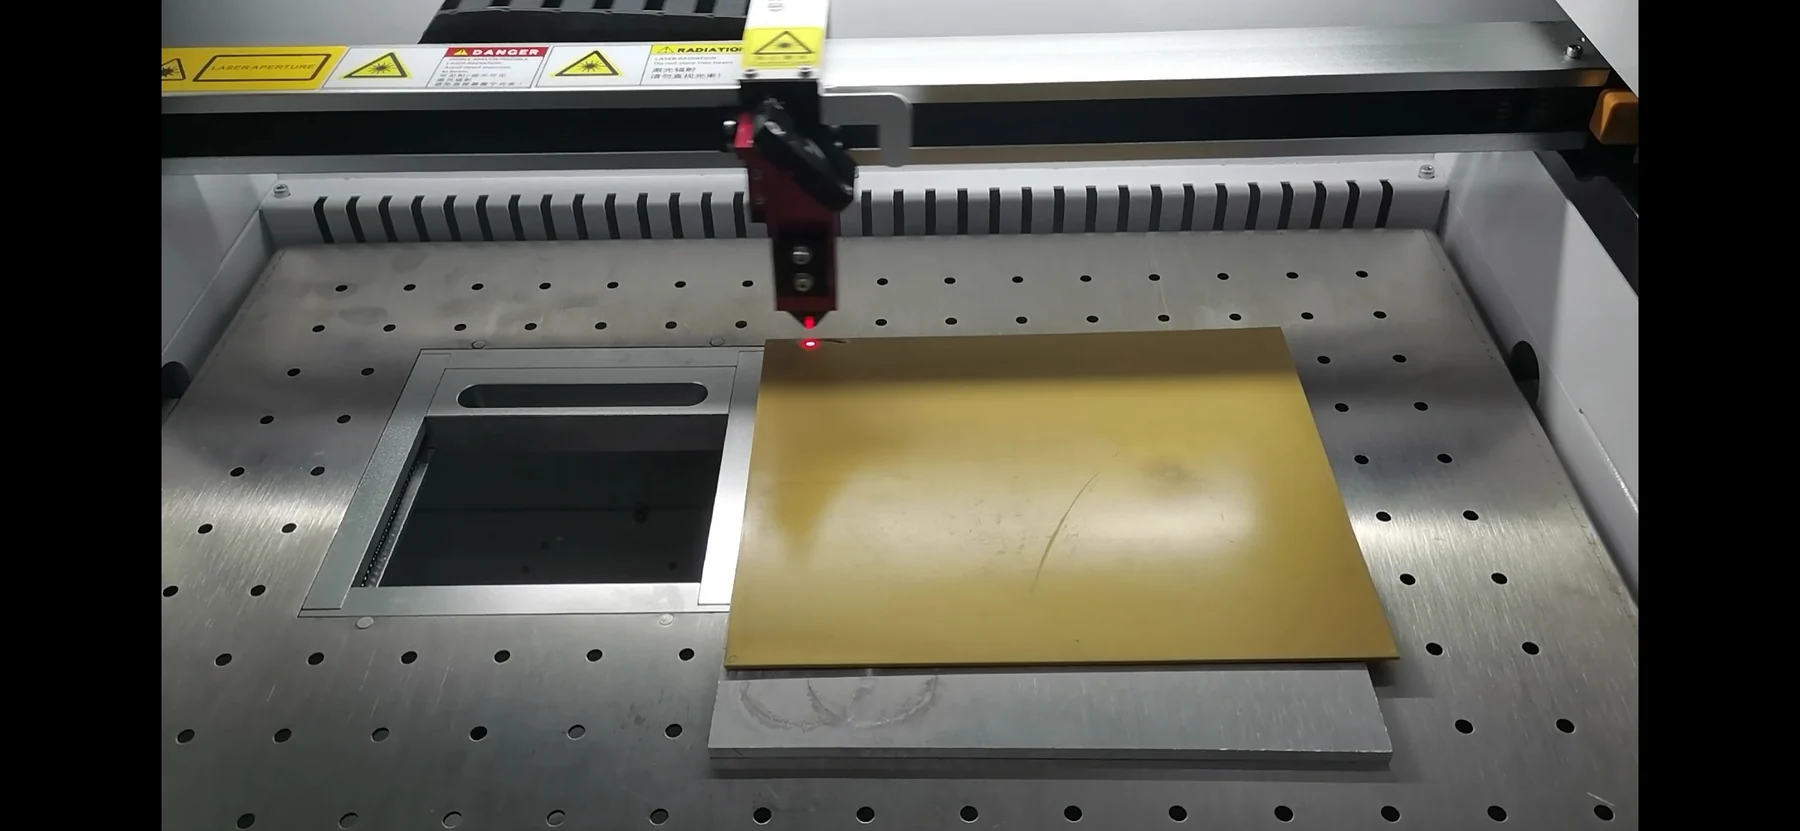
The prepared POM sheet is placed in the DF60D and processed by the CO₂ laser.
The same production workflow can engrave the relief geometry and cut the finished die outline, reducing the need to move the workpiece between separate machines.
Processing time varies with artwork, die size and production requirements.
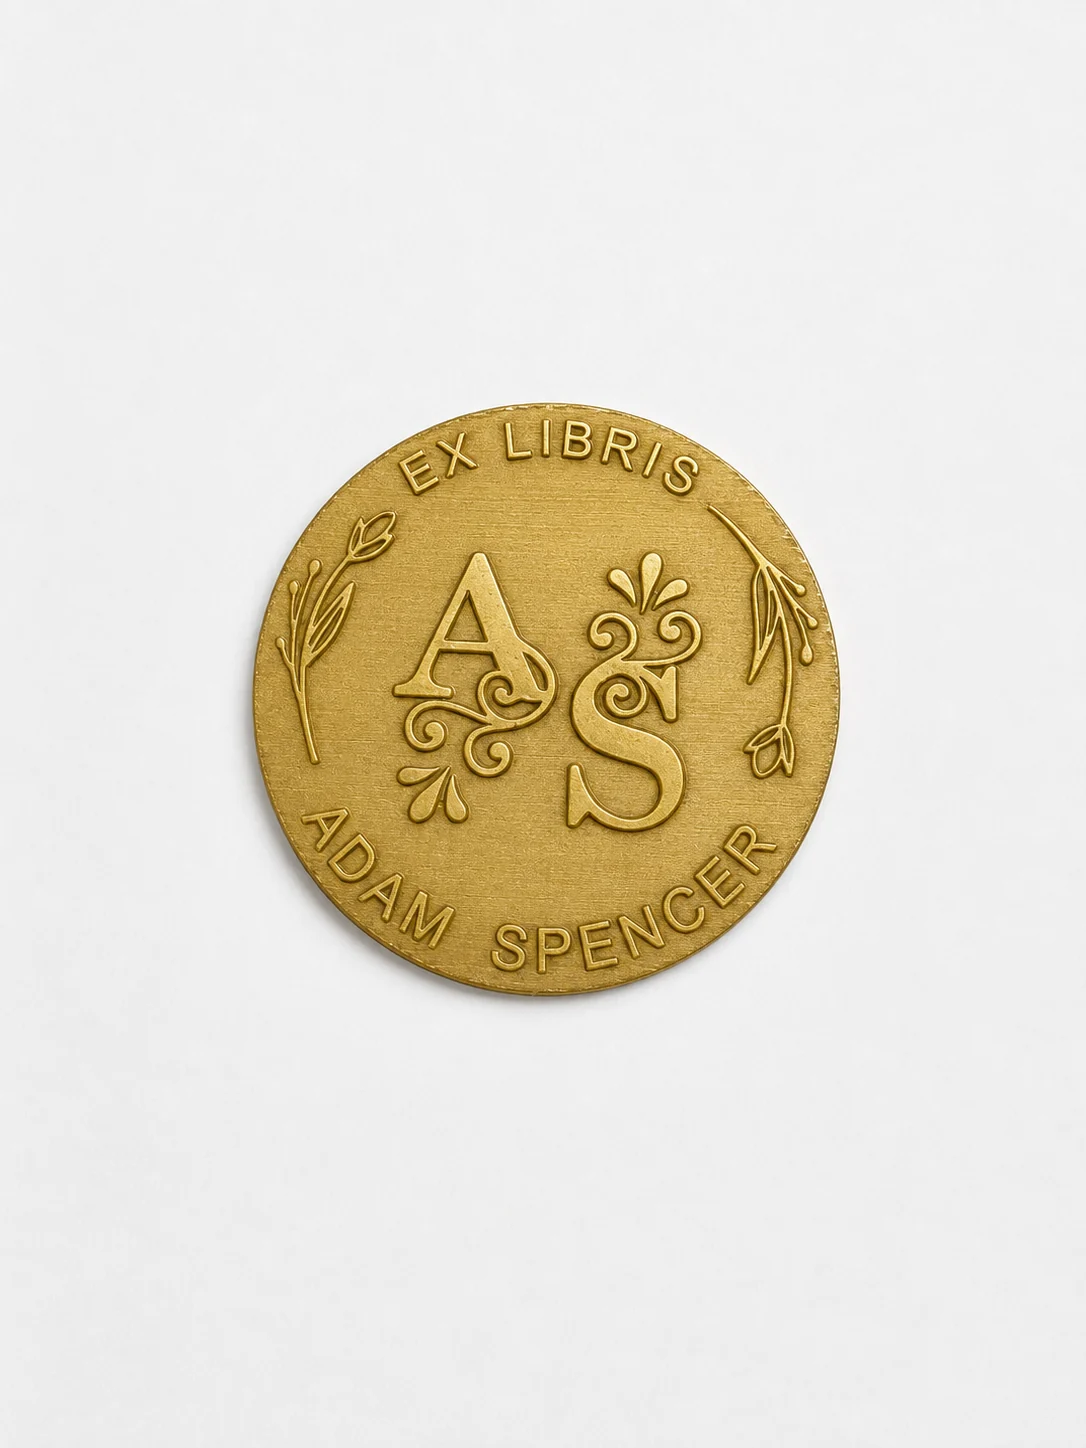
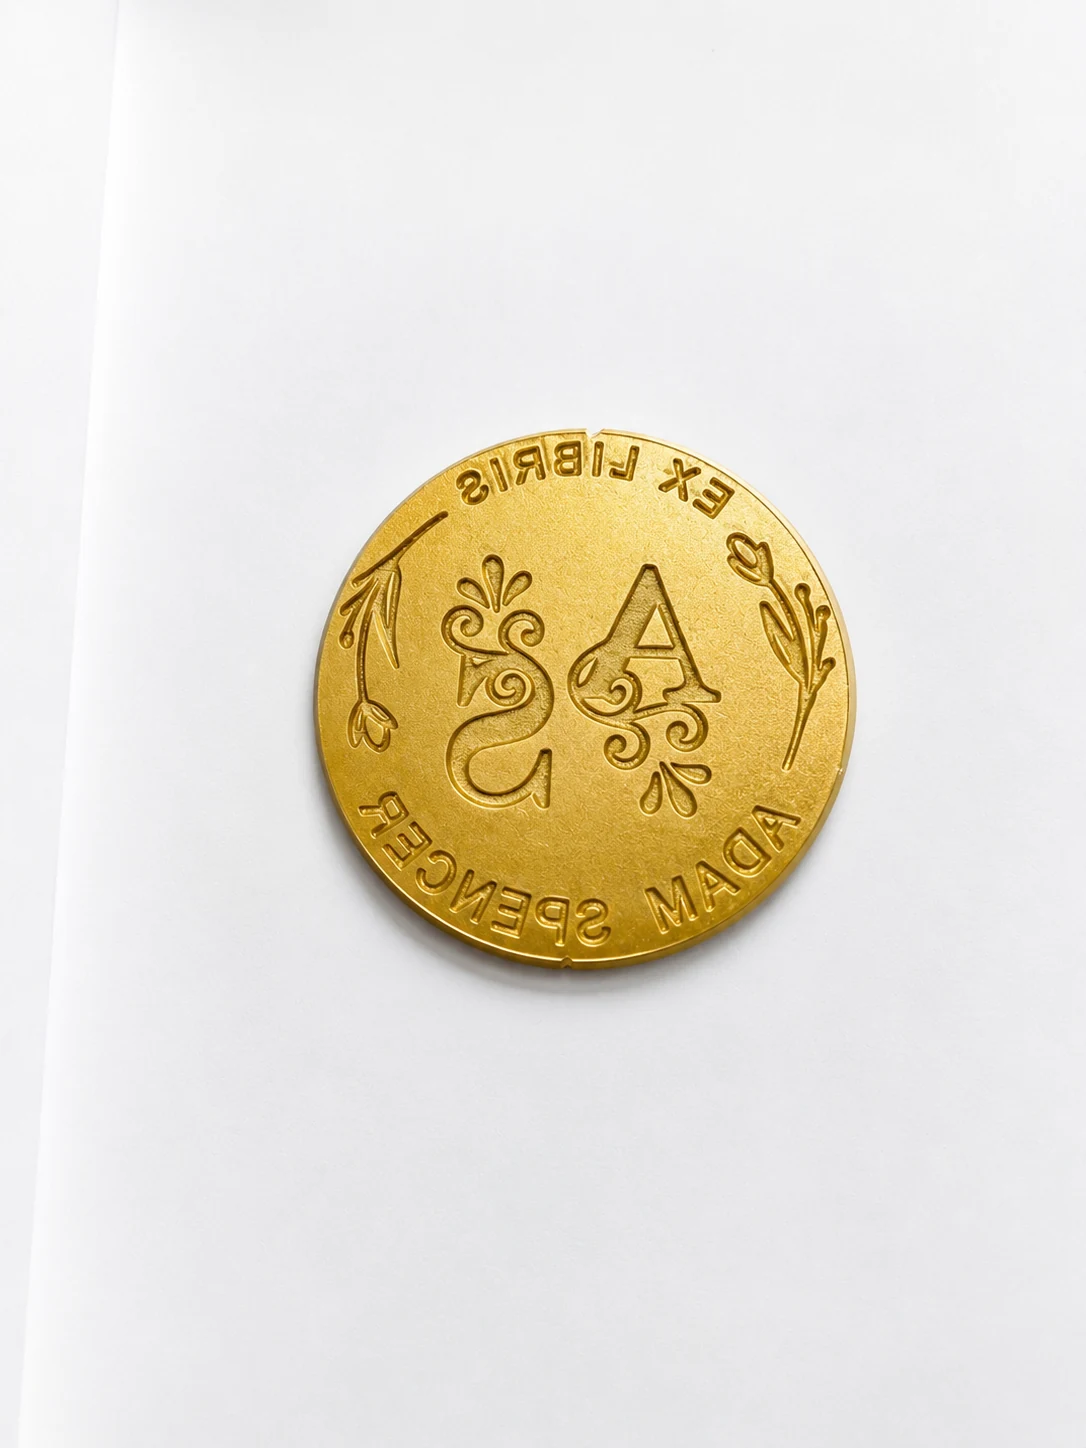
Step 3 — Produce the Male and Female Dies
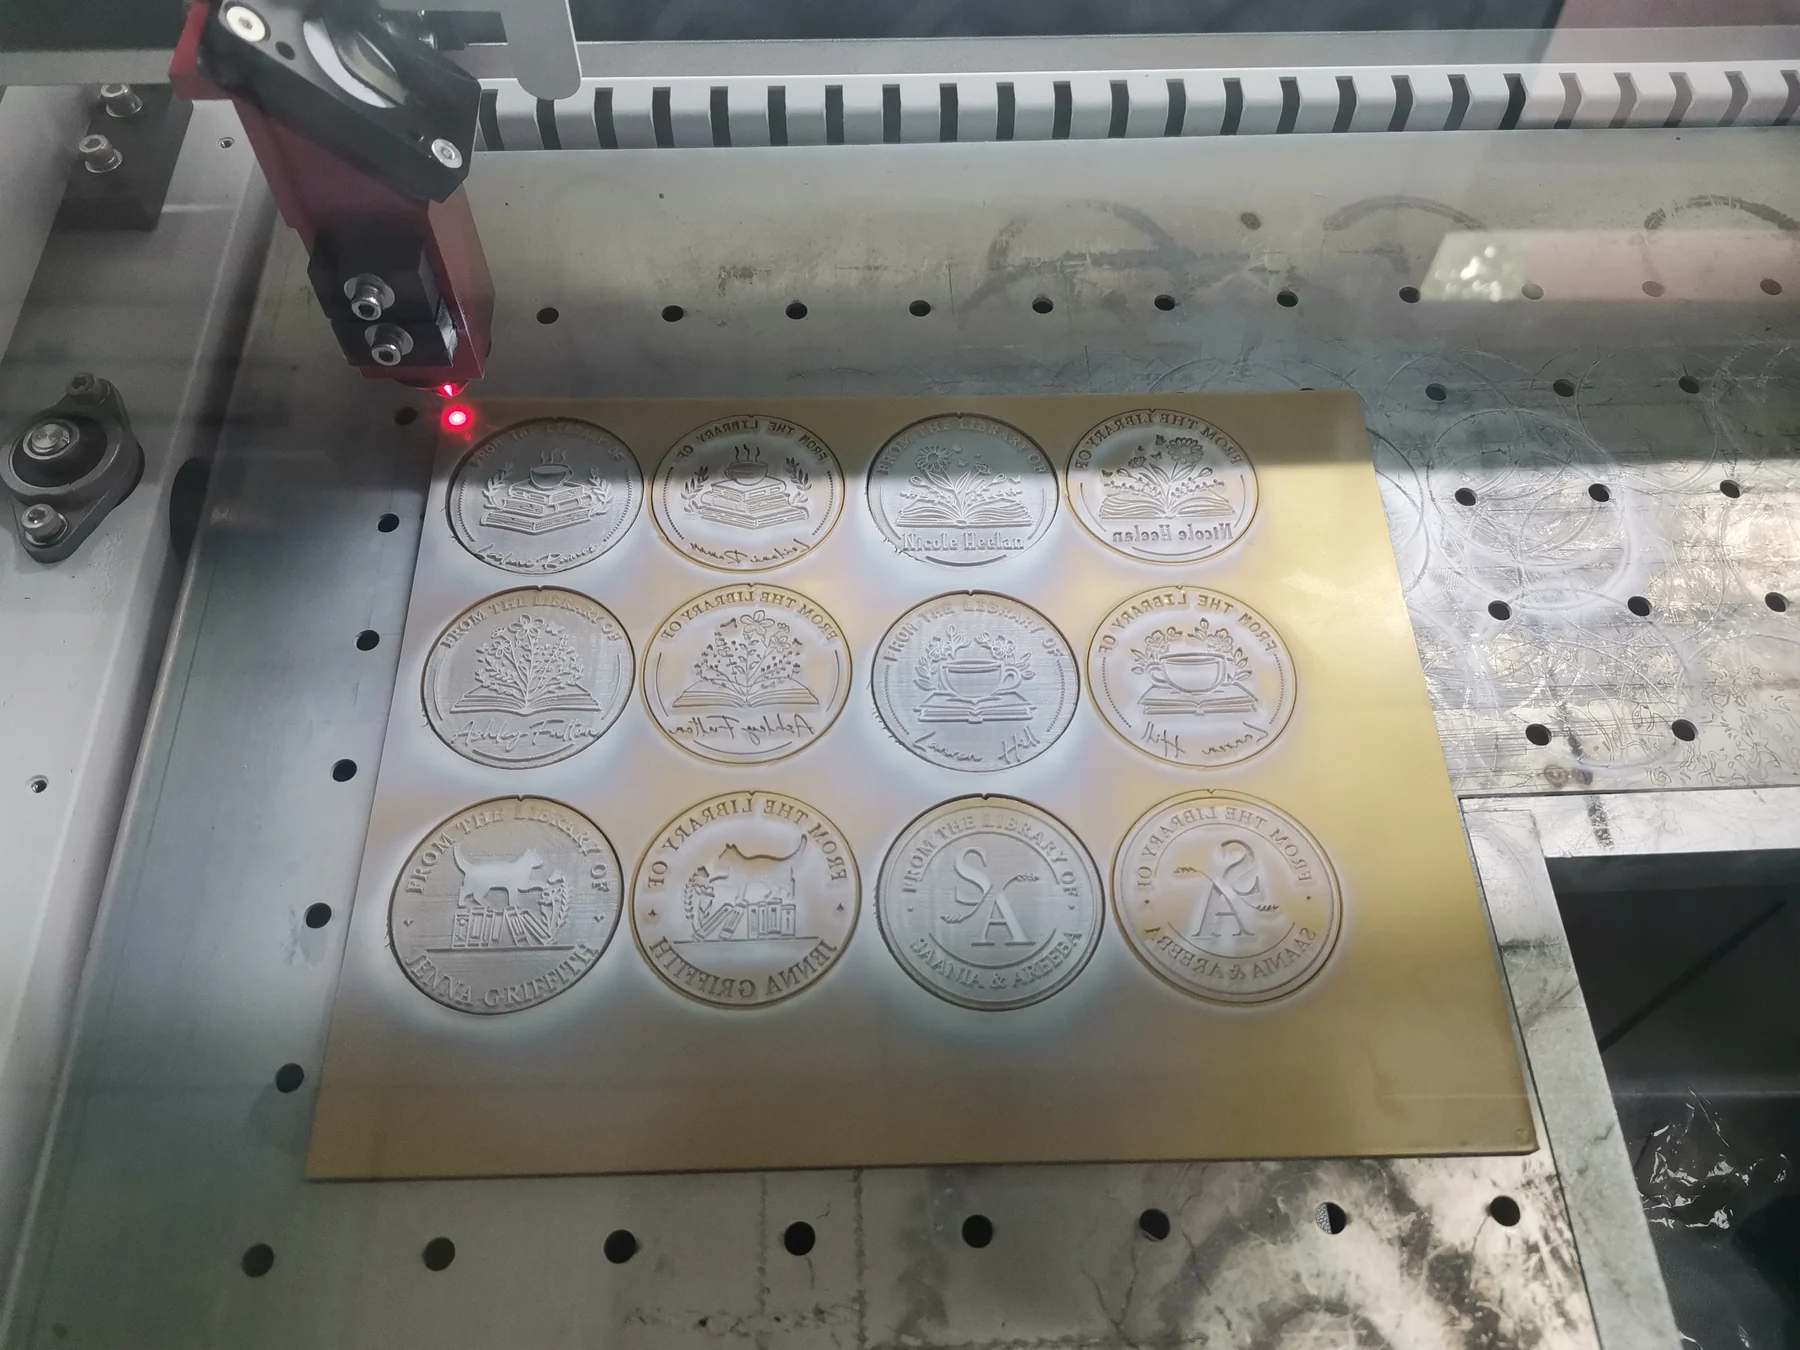
A functional embosser uses a matched pair: one male die and one female die. Their geometry must correspond so that the paper is formed between the two surfaces during pressing.
The two parts are produced as one matched die set rather than as unrelated individual pieces.
Step 4 — Align the Die Set
Fast and repeatable alignment is important during final assembly.
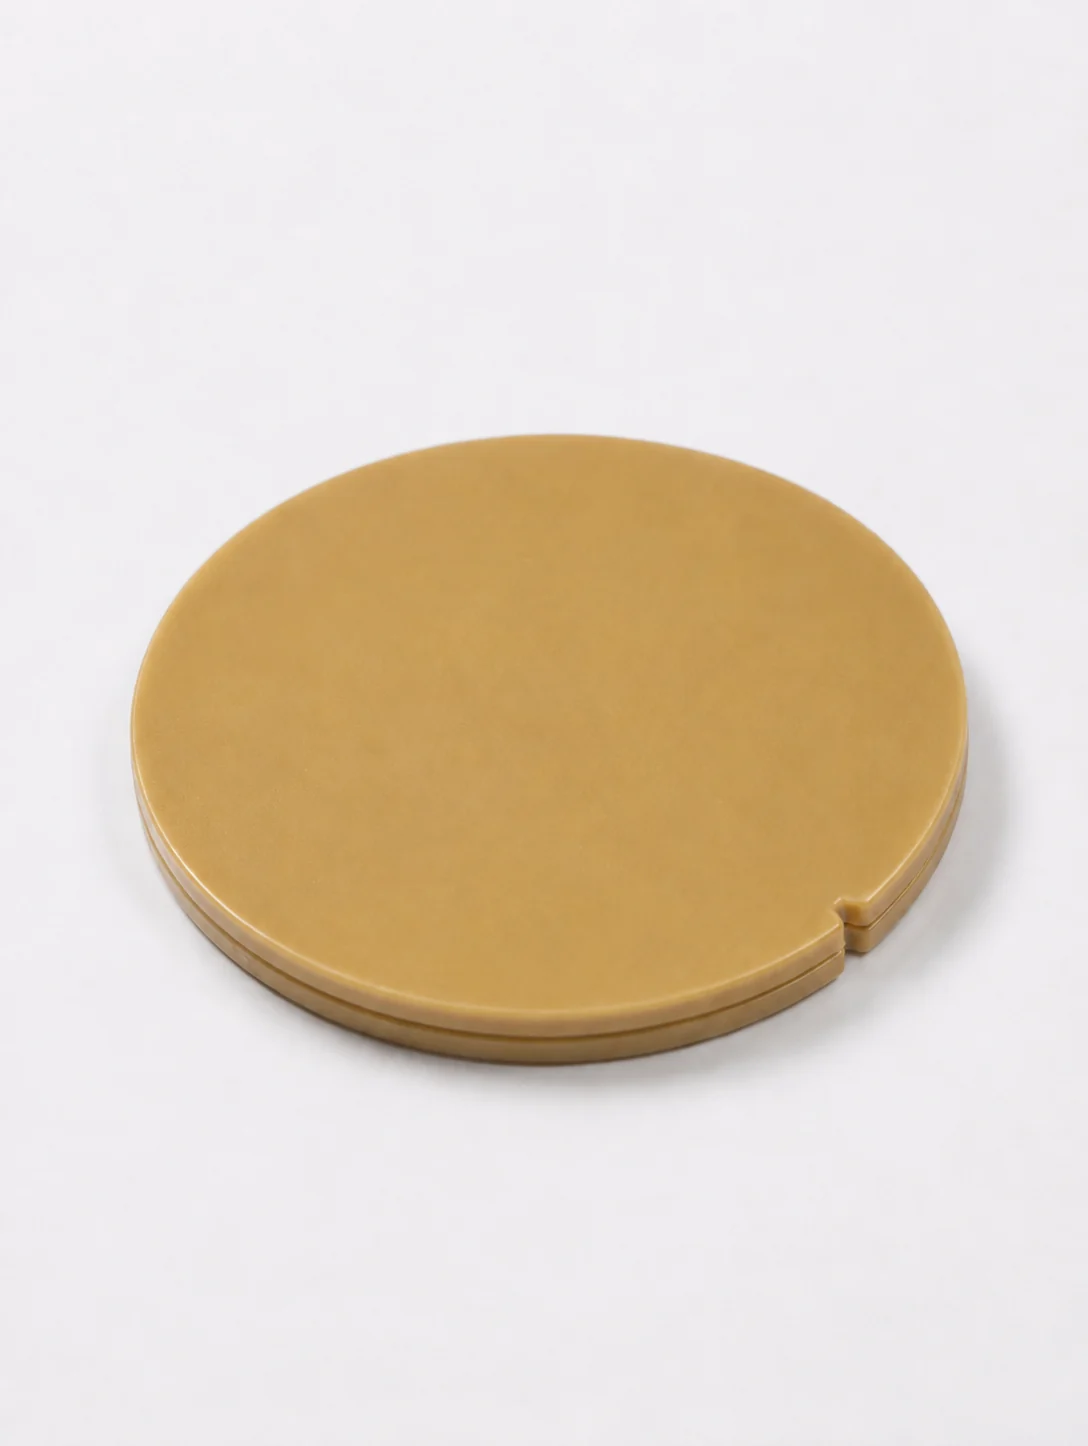
In the XLH Laser workflow, a small reference notch is intentionally included at the front of the die outline during the design and cutting stage. When the male and female dies are brought together, the matching notches provide a clear orientation reference.
This simplifies die alignment, reduces assembly time and also helps the operator identify the front direction of the final embossing pattern.
Step 5 — Install the Dies in the Embosser
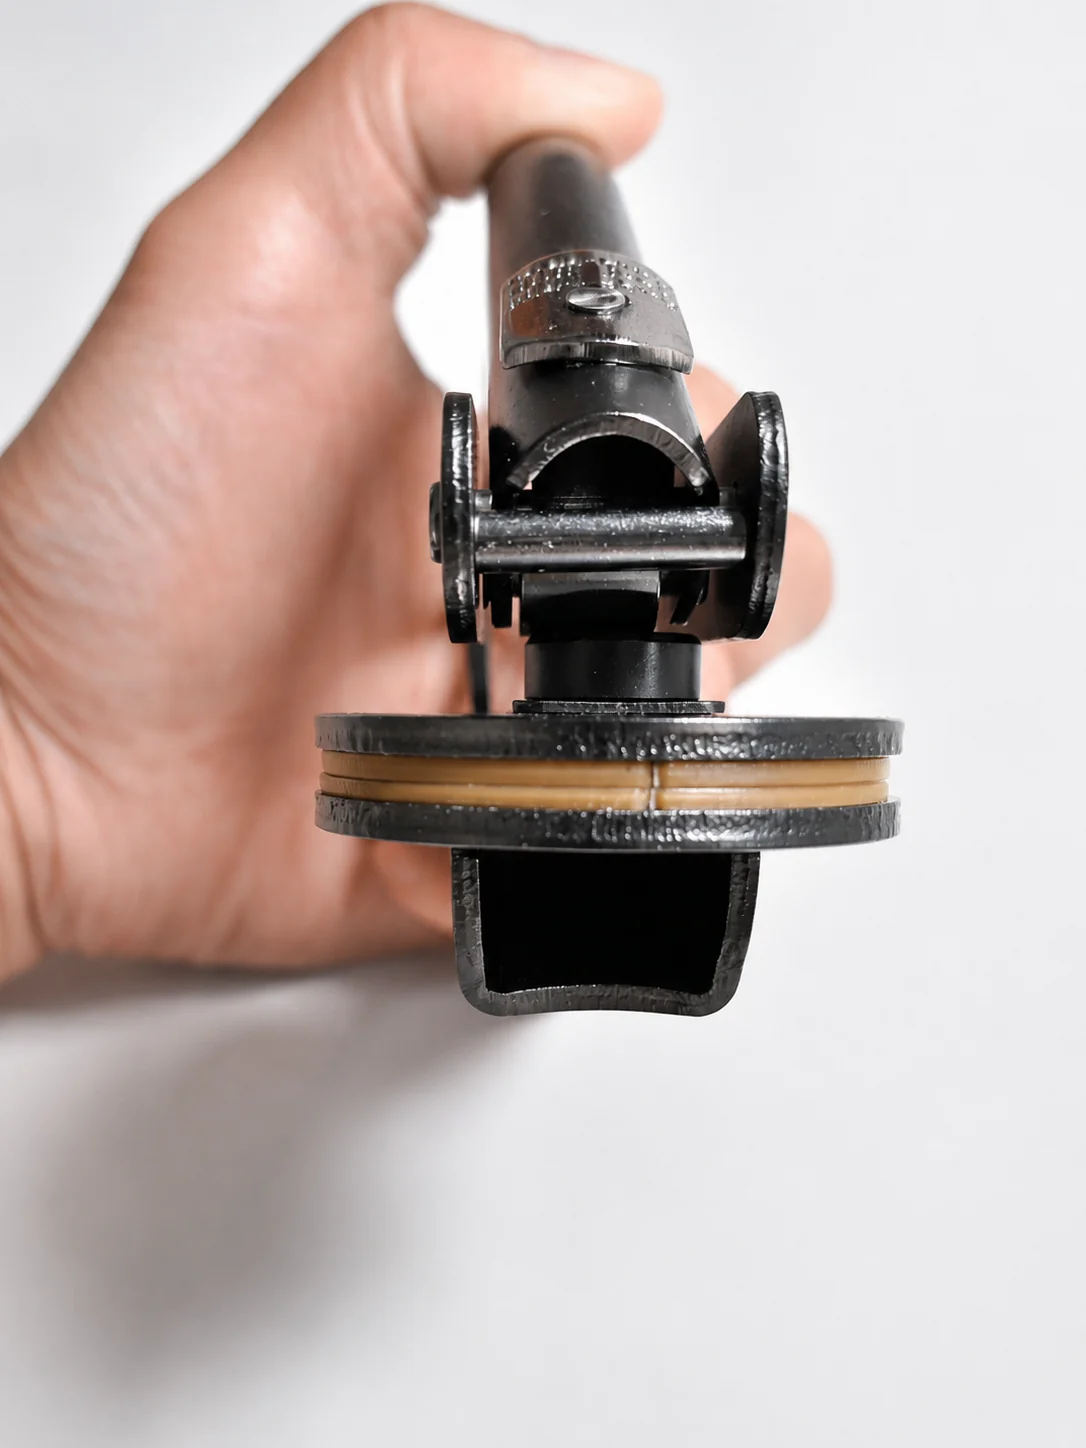
After the die pair is aligned, it is installed into the embosser hardware.
The finished die set can be used with handheld embosser configurations and, with the appropriate material and hardware selection, with heavier-duty embosser systems.
Step 6 — Verify the Embossing Result
The process is not considered complete when the laser stops.
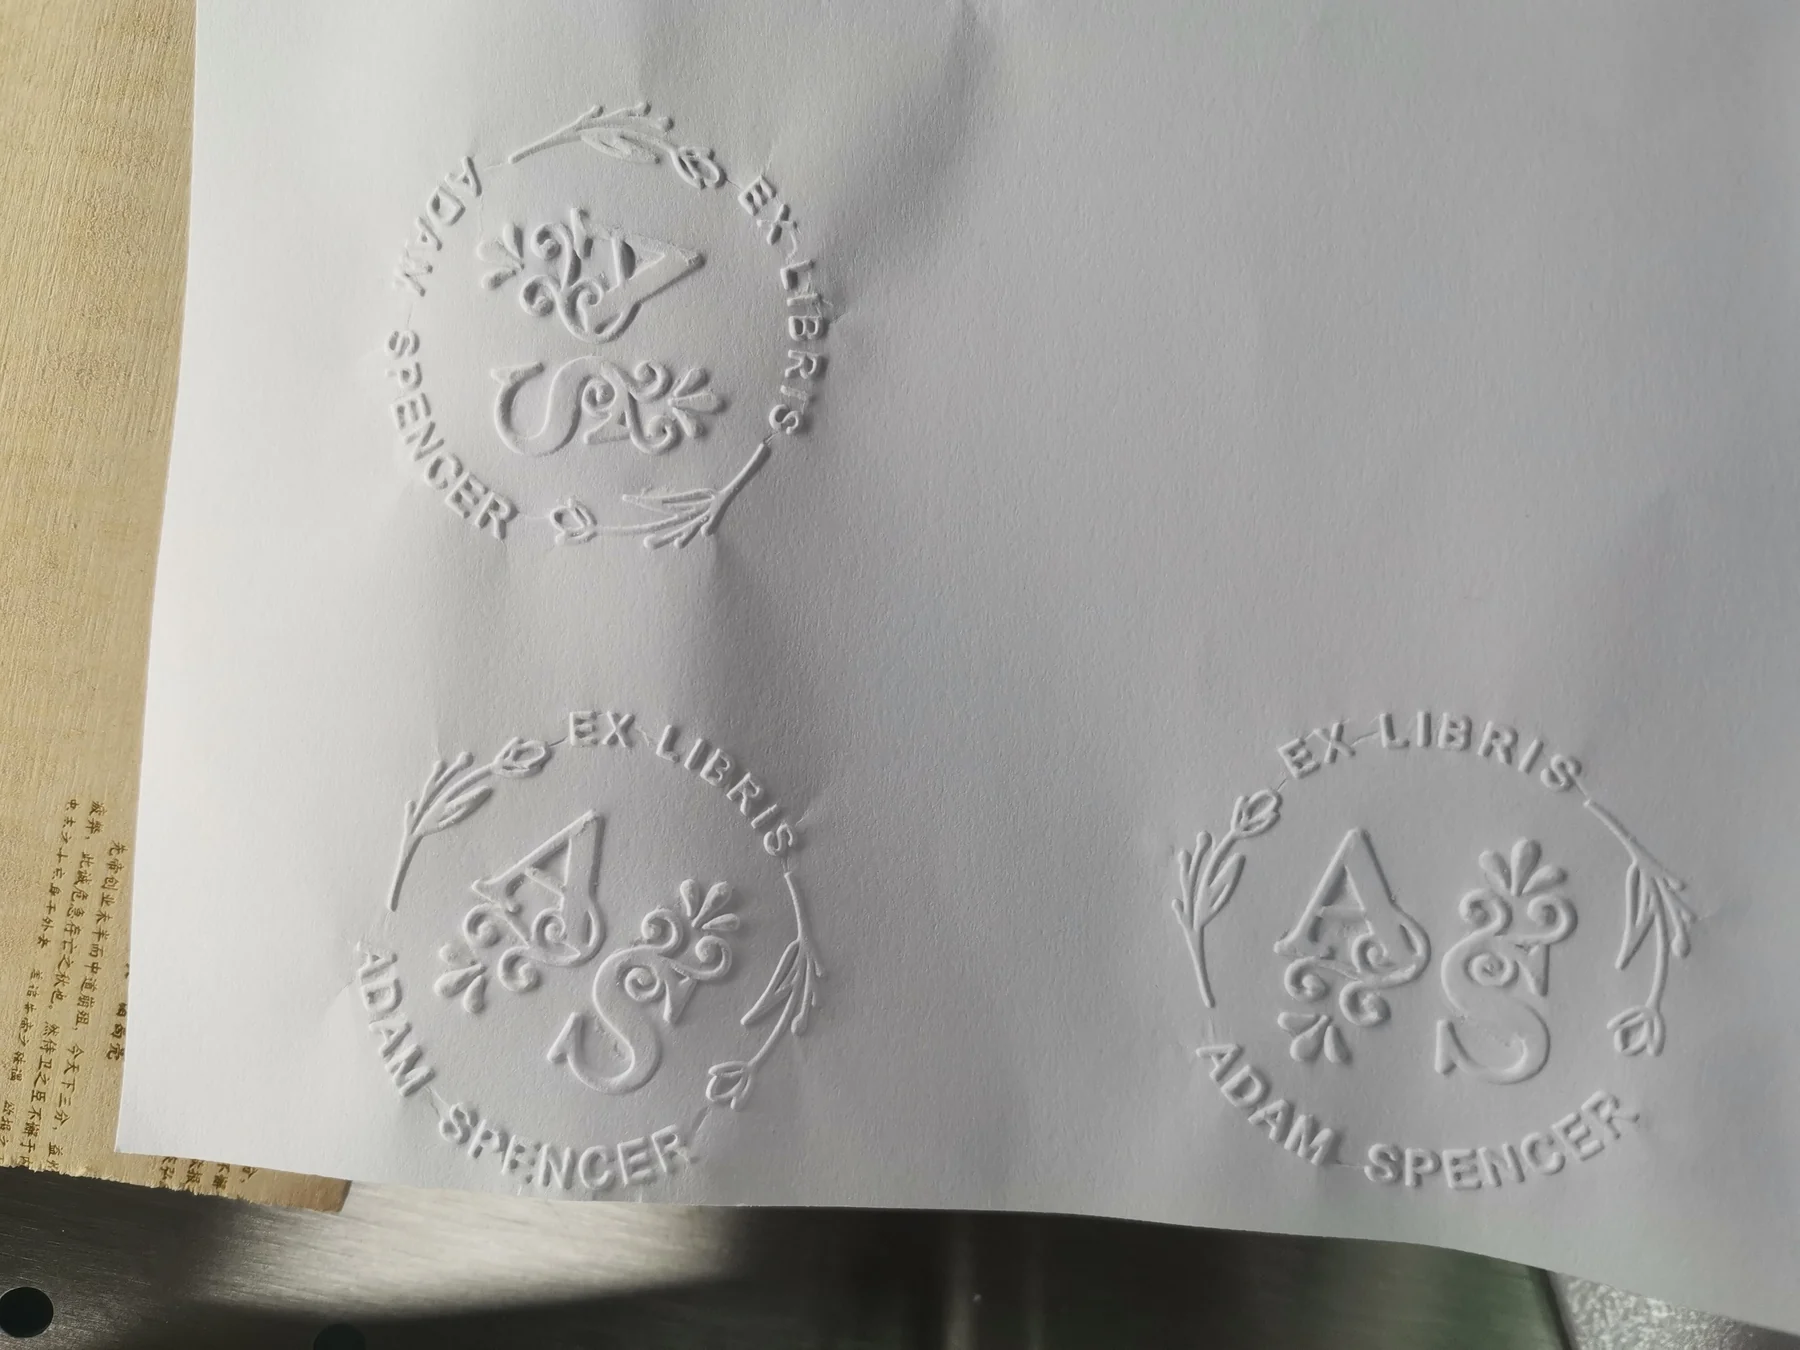
The finished die set is installed and tested through actual embossing. This final check confirms that the male and female dies work together correctly and that the finished pattern produces the intended result.
The objective is a usable production result, not simply a laser-engraved piece of material.
CURRENT FORMATS
Common Embosser Die Formats
Because the die geometry is prepared digitally before engraving and cutting, the workflow is not limited to one fixed shape. XLH Laser currently produces common formats including:
42 mm Round
A common format for portable and custom embossers.
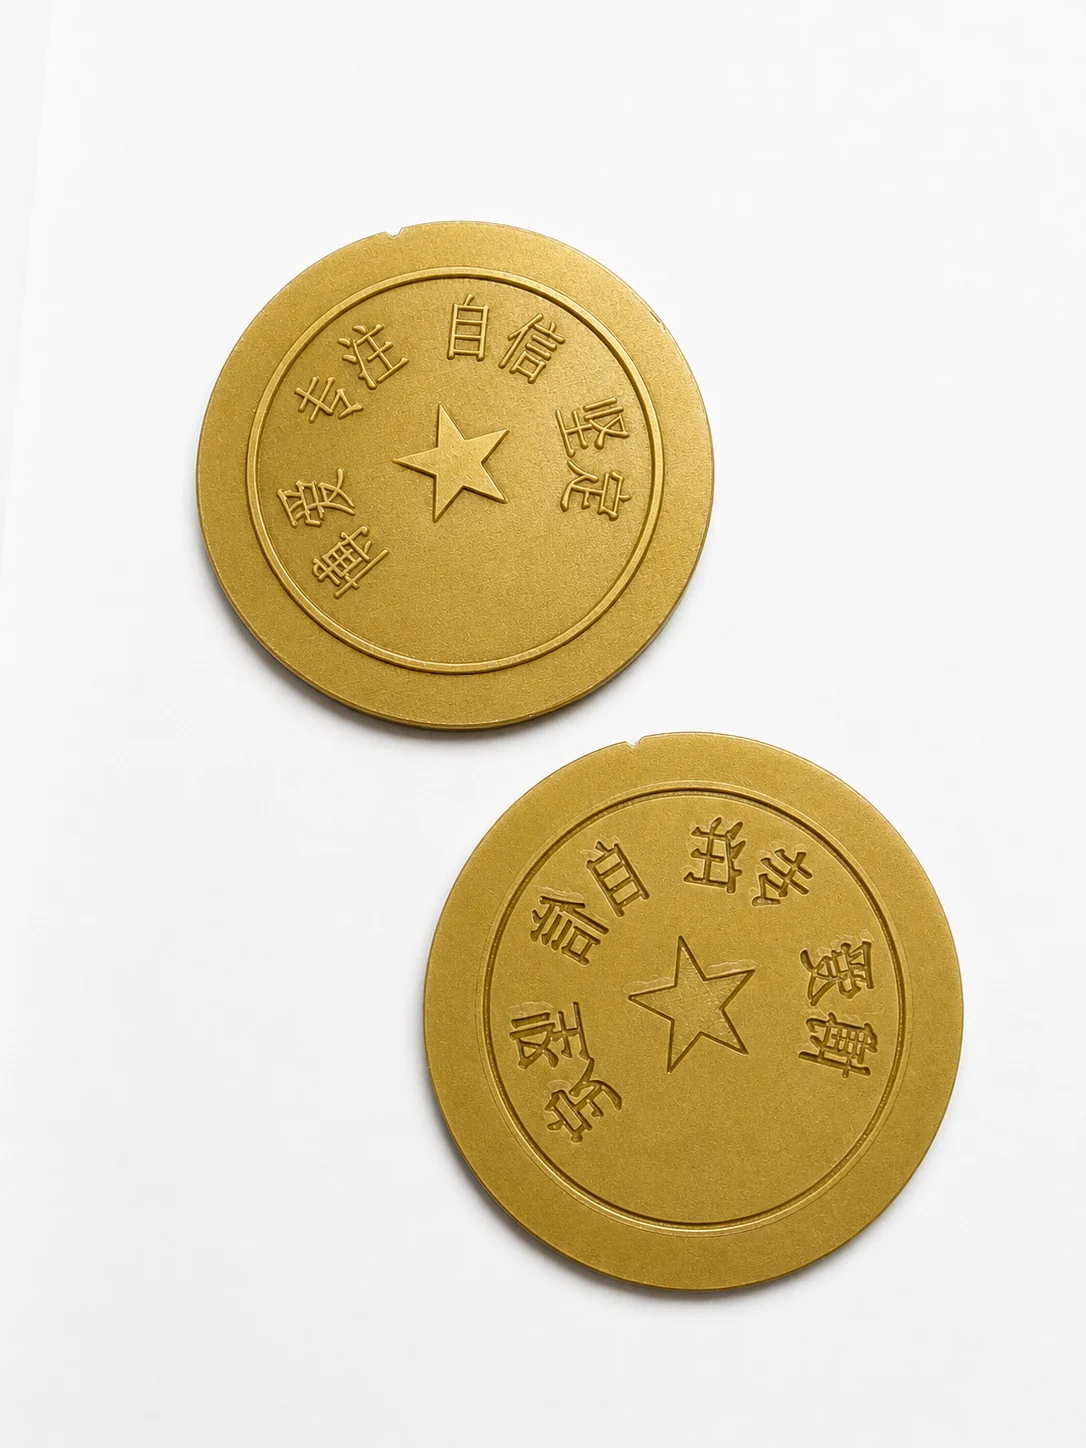
50 mm Round
A larger round format for applications requiring more design area.
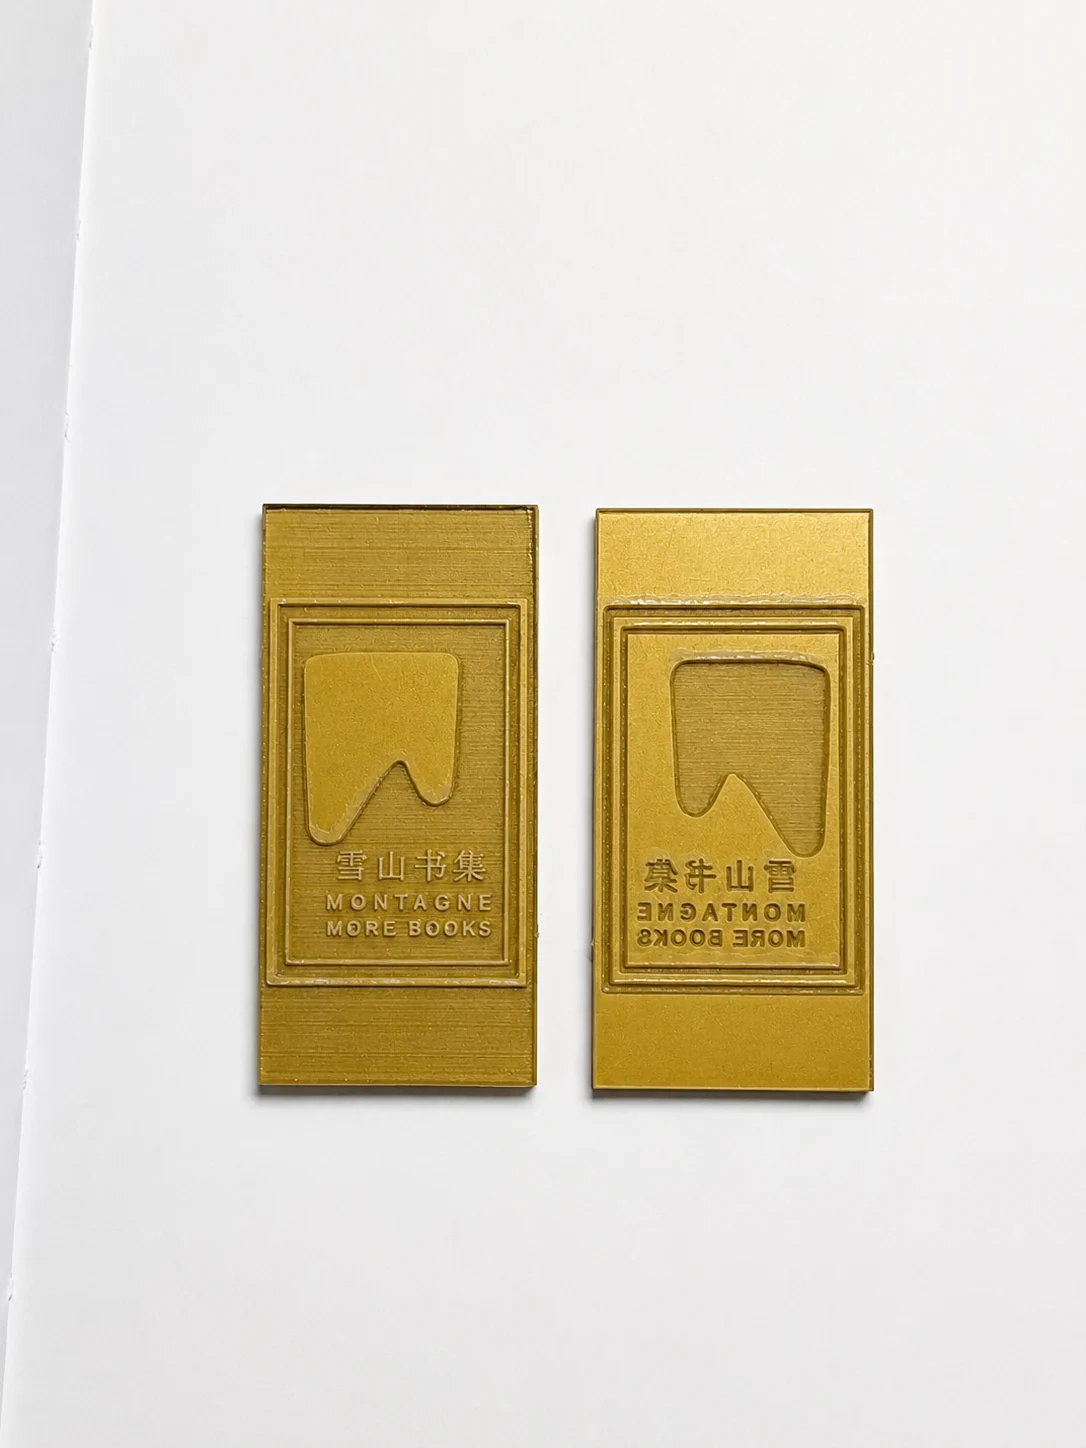
50 × 30 mm Rectangular
Suitable for rectangular artwork and alternative embosser formats.
Other sizes and layouts can be prepared according to the embosser hardware and artwork requirements.
FUNCTIONAL RELIEF
Relief Geometry Designed for Embossing
Embosser dies should not be treated like a simple flat engraving.
The POM dies produced in the DF60D workflow have sloped relief sidewalls rather than an abrupt vertical edge. This is similar in principle to the tapered relief commonly seen in machined embossing dies.
The gradual relief geometry helps the paper form around the design during pressing and reduces the tendency for sharp die edges to cut or damage the paper.
For practical artwork, relief and registration guidance, see the Embosser Die Design Guide.
VERIFIED OUTPUT
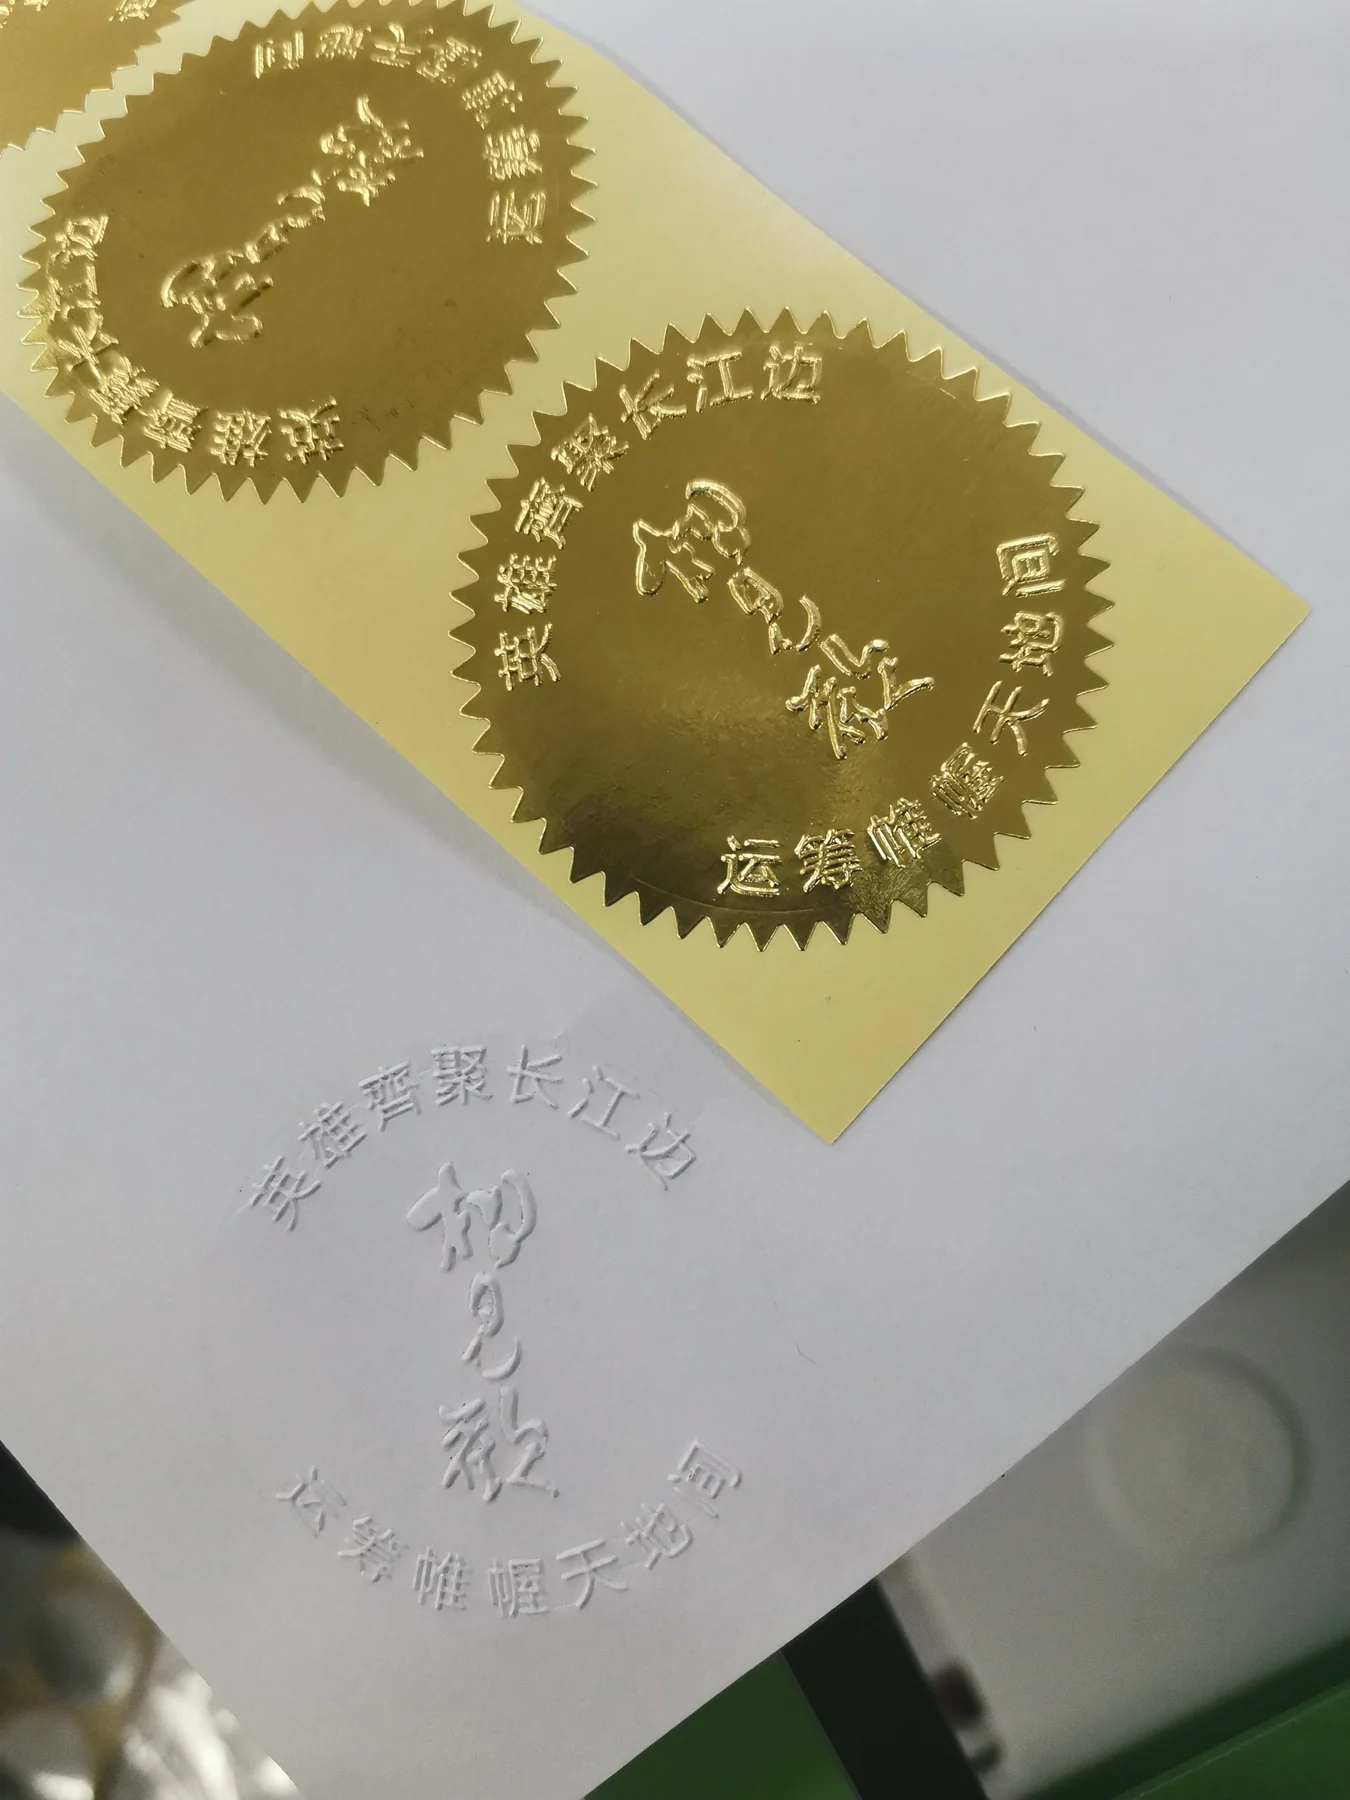
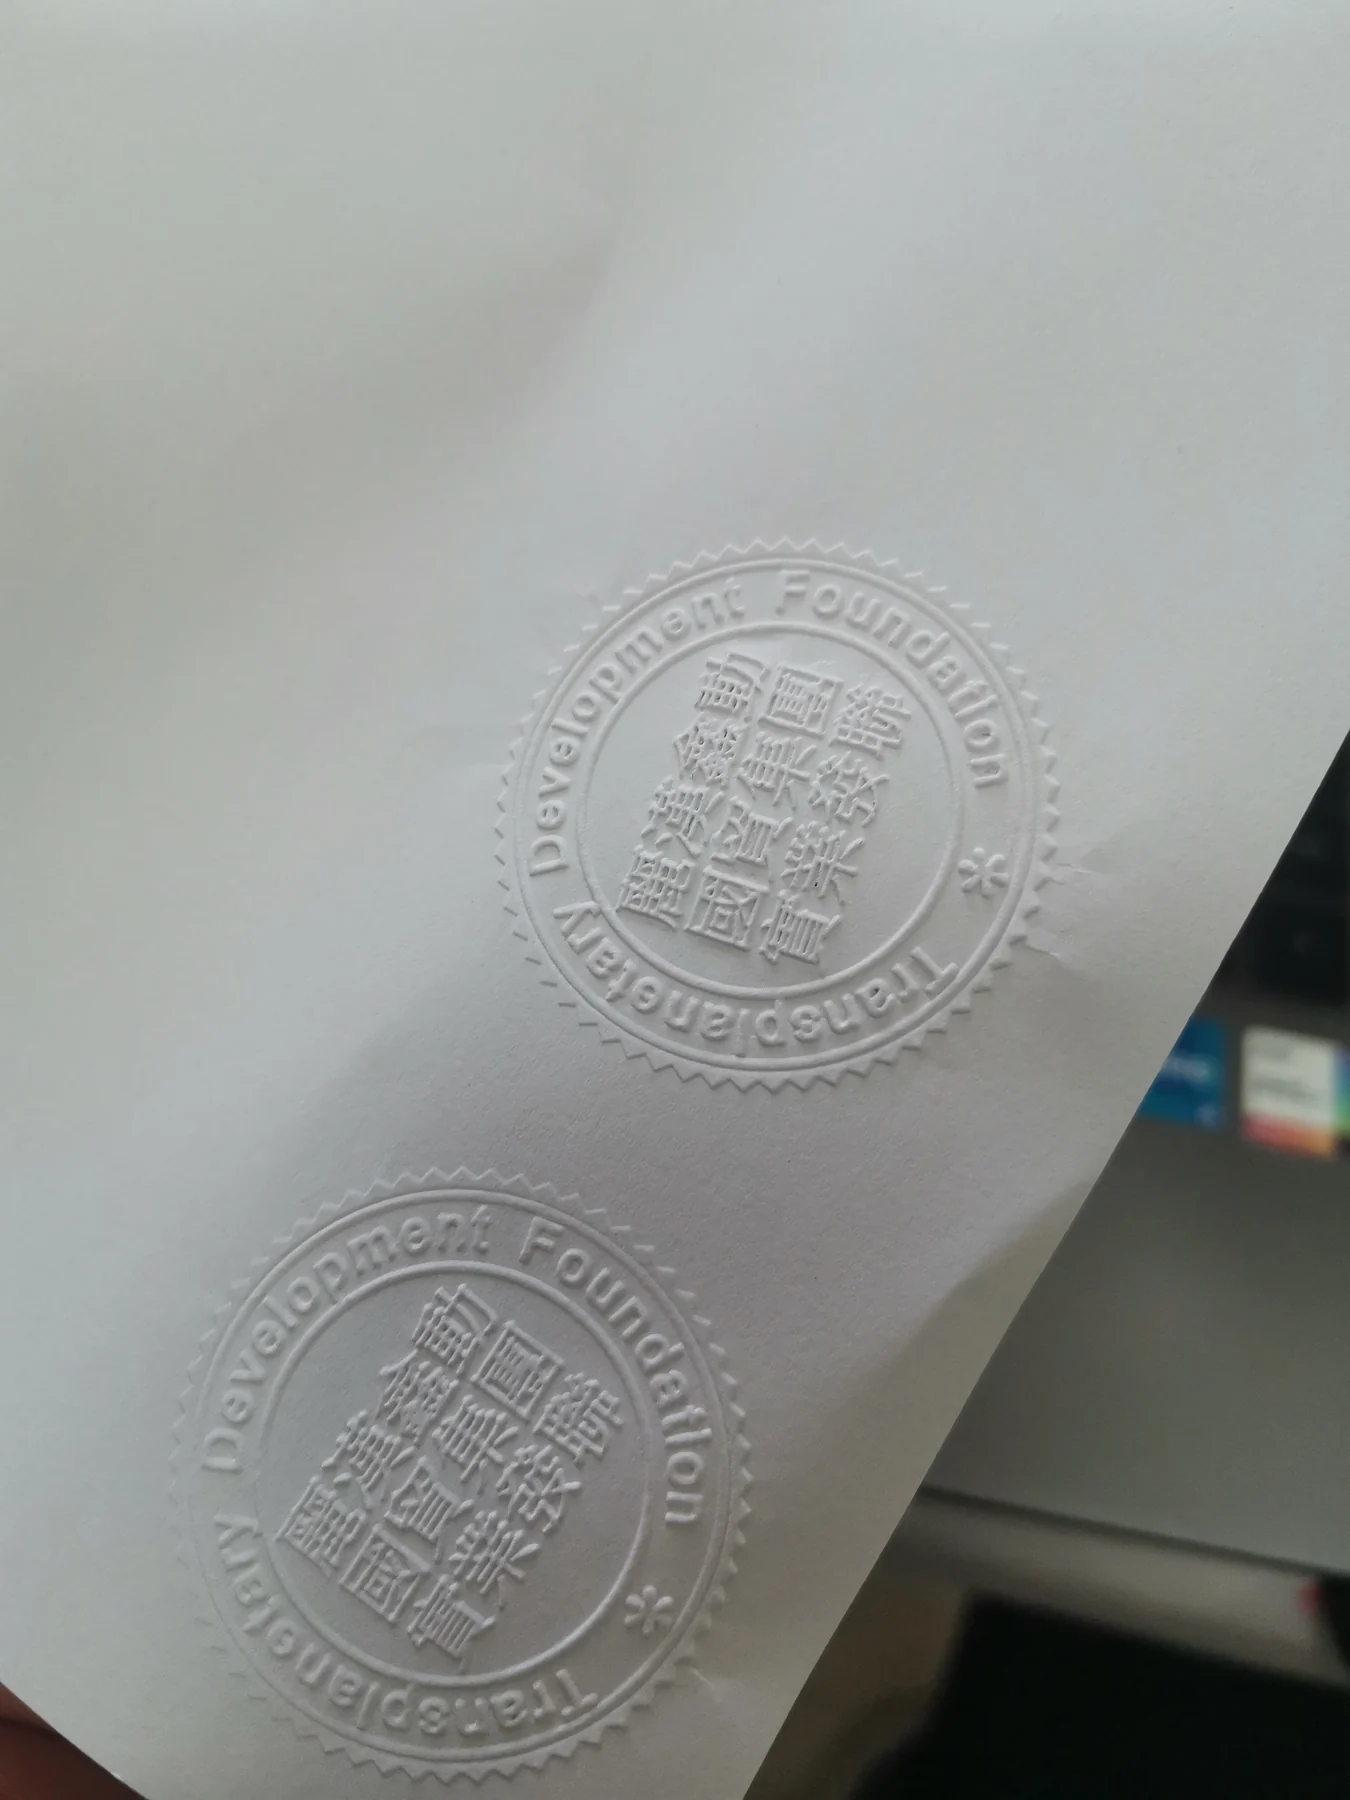
Real Embossing Results
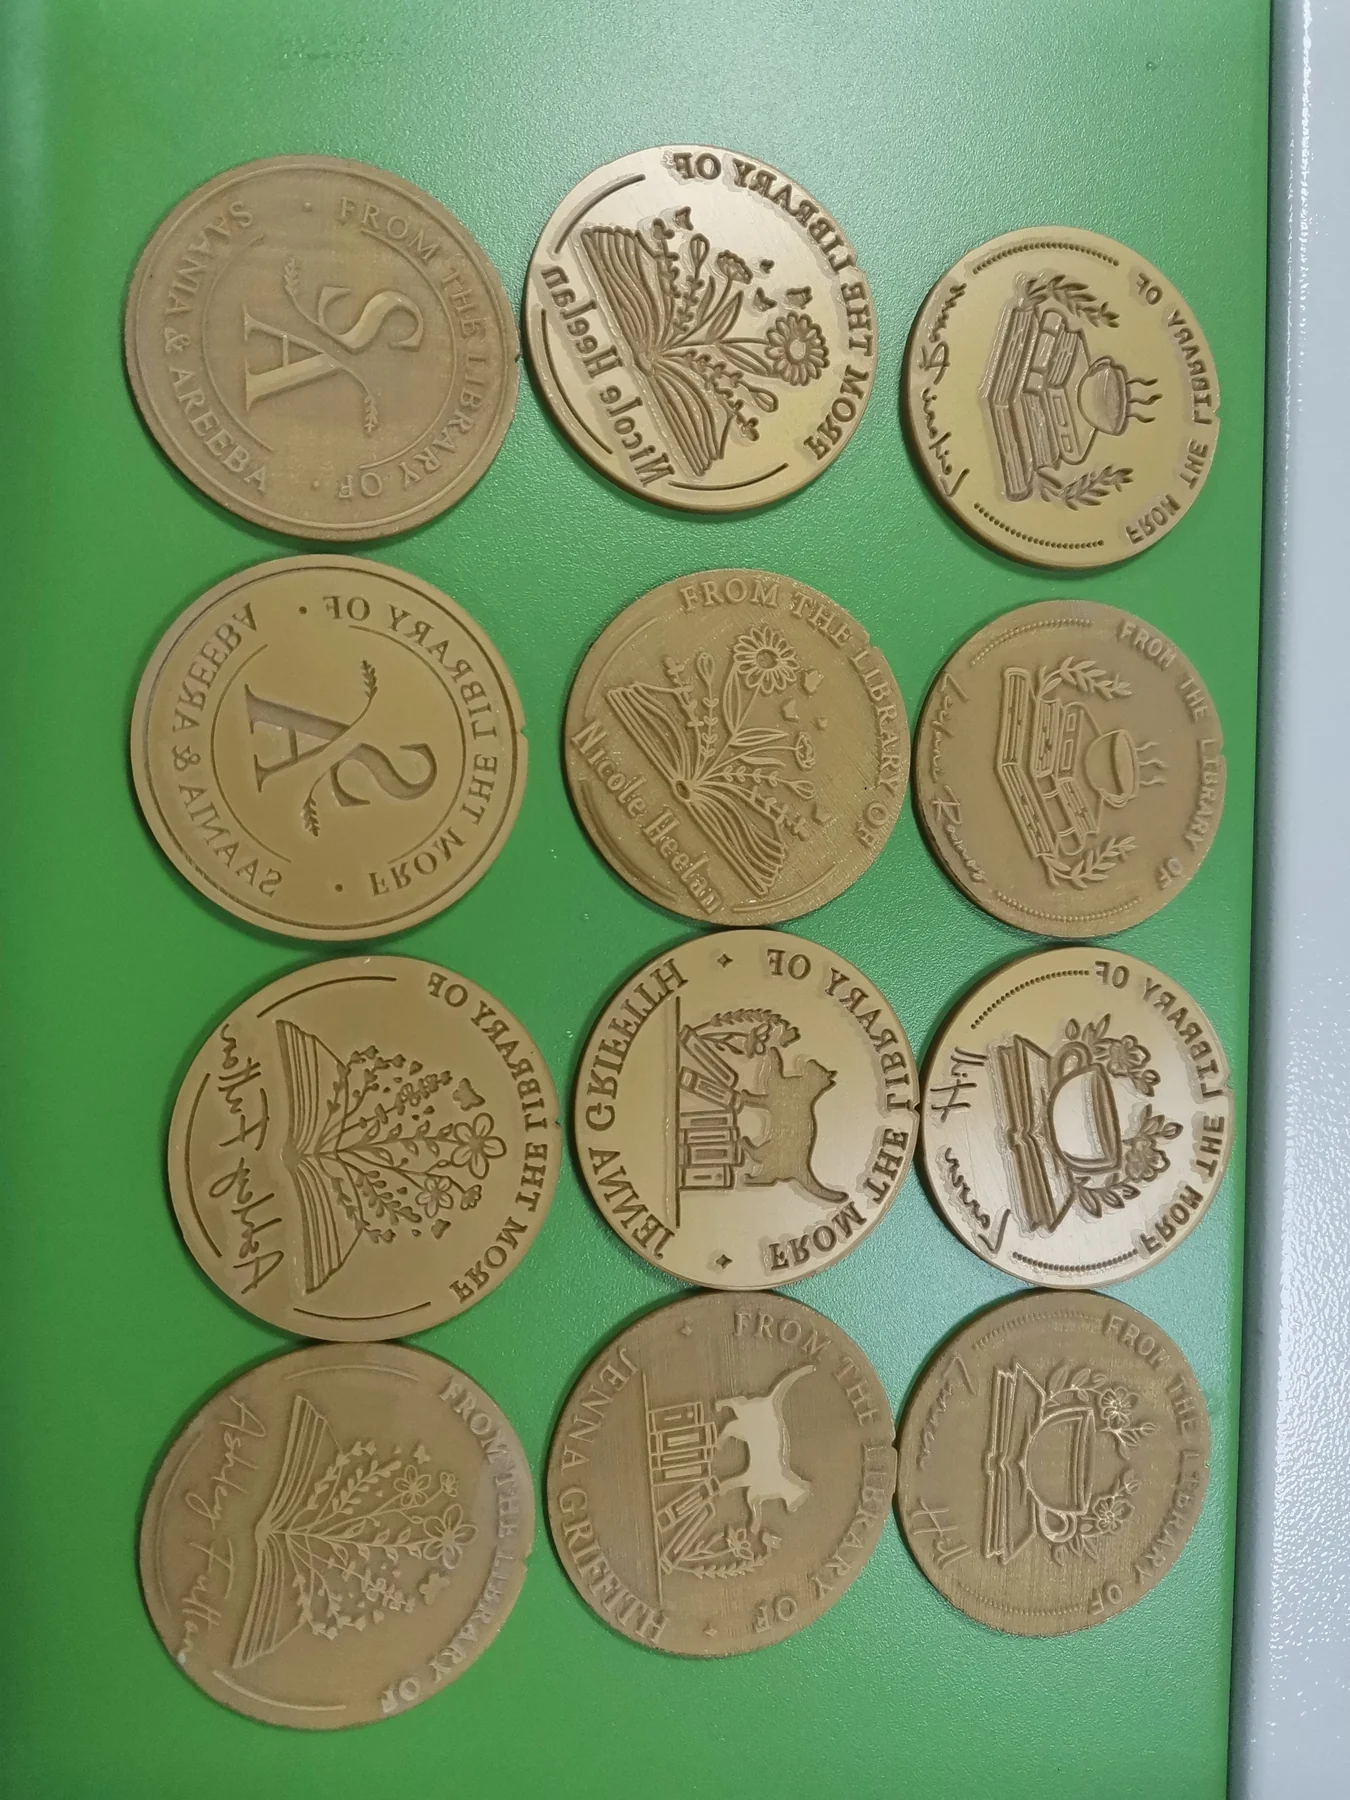
A laser-made die has value only when it performs correctly in the finished embosser. XLH Laser evaluates the completed die pair after installation using real embossing applications. The examples below show finished results from the production workflow.
VIDEO
Watch the Complete Production Workflow
See the complete sequence from POM laser processing to die assembly and final embossing. The material, equipment and embosser hardware work as one connected production workflow rather than as separate products.
Awaiting XLH Laser branded video export
CONNECTED PRODUCTION
Why This Workflow Works for Custom Embosser Production
Each production stage is designed to support the next, from material selection through final output verification.
Equipment + Material Integration
The laser, POM material and embosser hardware are selected as parts of one production process rather than as unrelated products.
Flexible Die Formats
Digital preparation makes it possible to produce different round and rectangular die formats according to the embosser design.
Faster Die Alignment
The reference-notch method provides a simple orientation point for matching the male and female dies during assembly.
Real Output Verification
Finished dies are evaluated through actual embossing results rather than only by inspecting the laser engraving.
XLH Laser focuses on the complete production chain: equipment + material + process + workflow guidance + accessories + after-sales support.
FAQ
Frequently Asked Questions
Can a CO₂ laser make embosser dies?
Yes. In the XLH Laser workflow, the DF60D CO₂ laser is used to engrave and cut POM into matched male and female dies for embosser production. The dies are then aligned, installed and verified through actual embossing.
What material is used for laser-made embosser dies?
XLH Laser uses POM die material for this workflow. The standard sheet format used in our production is 210 × 170 mm, with material thickness selected according to the embosser configuration.
What artwork is needed to make an embosser die?
Most customer jobs can begin with a clear black-and-white image. The artwork is then prepared in LightBurn for the required die format and production workflow.
How are the male and female dies aligned?
A matching reference notch can be added to the front of both dies during the design and cutting stage. Aligning the notches provides a simple orientation reference during assembly.
What embosser die sizes can be produced?
Common formats in the XLH Laser workflow include 42 mm round, 50 mm round and 50 × 30 mm rectangular dies. Other formats can be prepared according to the embosser hardware and artwork requirements.
How long does it take to make one embosser die set?
In one demonstrated DF60D workflow, engraving and cutting of one matched die set were completed in approximately 3 minutes 35 seconds. Actual time depends on artwork complexity, die size and production requirements.
Can POM dies be used in both handheld and heavy-duty embossers?
Yes, POM die material can be used for both types of applications when the material thickness and embosser hardware are selected appropriately. XLH Laser commonly uses different POM thicknesses for handheld and heavier-duty configurations.
Does XLH Laser only supply the laser machine?
No. XLH Laser is developing a complete embosser-production solution covering equipment, POM material, embossers and accessories, production workflow guidance, application support and after-sales service.
COMPLETE SOLUTION
Need a Complete Embosser Die Solution?
If you are starting or improving embosser die production, XLH Laser can help you evaluate the equipment, die material, embosser hardware and workflow as one complete system.
Whether you need a laser machine, POM die material, embosser components or support for a complete production setup, tell us what you want to manufacture and we can discuss the most suitable configuration.