EMBOSSER DIE DESIGN GUIDE
Embosser Die Design Guide for CO₂ Laser POM Dies
A good embosser die begins with artwork that is designed for physical embossing—not only for appearance on a computer screen.
In the XLH Laser workflow, digital artwork is converted into a matched male and female POM die set, processed with a CO₂ laser, aligned, installed in the embosser and finally verified through an actual embossing test.
This guide explains the practical design principles that matter when preparing artwork for custom book embossers, handheld embossers and related POM die applications.
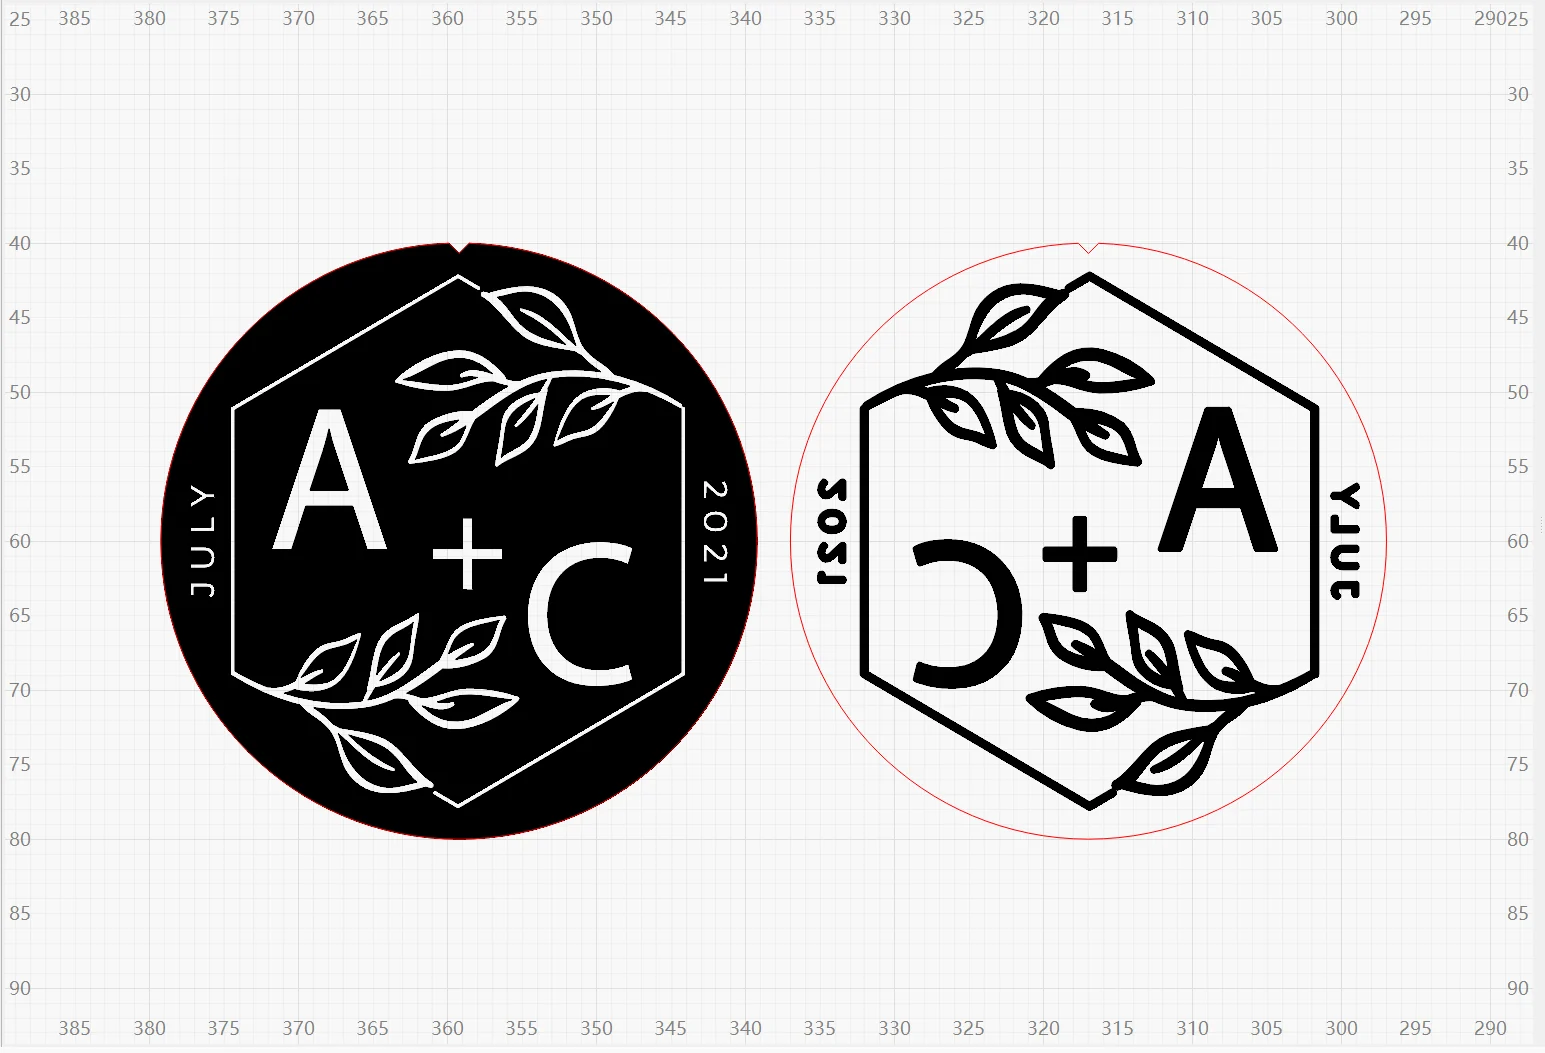
DESIGN PRINCIPLE
Design for the Embossed Result, Not Just the Screen
Artwork can look clean and highly detailed on a monitor but still behave differently after it is converted into physical relief and pressed into paper.
Embossing is a complete physical system:
For this reason, XLH Laser evaluates a die design by the finished embossing result rather than by the digital file alone.
ARTWORK PREPARATION
Start with Clean Black-and-White Artwork
POM embosser die production starts with artwork that clearly separates the areas that will become physical relief.
Simple black-and-white artwork is generally easier to interpret and convert into a matched die system than artwork containing unnecessary shading, photographic detail or complex tonal information.
The objective is not to preserve every visual detail from the original image. The objective is to preserve the elements that can remain clear in the final physical impression.
DIGITAL ARTWORK
Prepared Male and Female Artwork
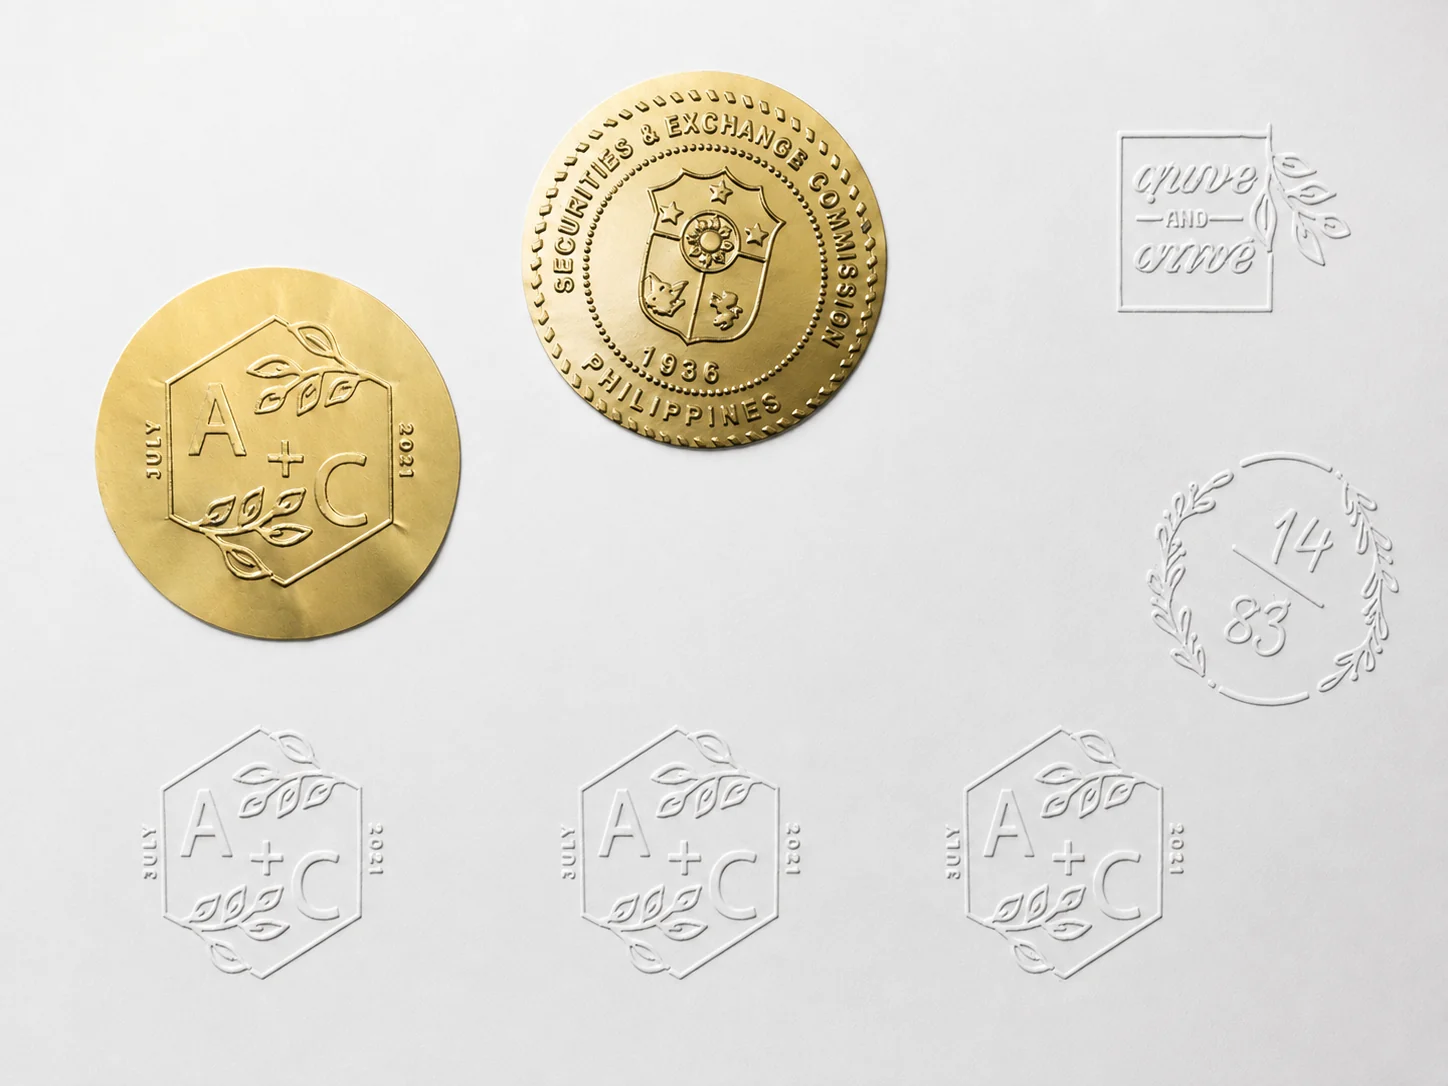
PHYSICAL RESULT
Verified Embossing Result
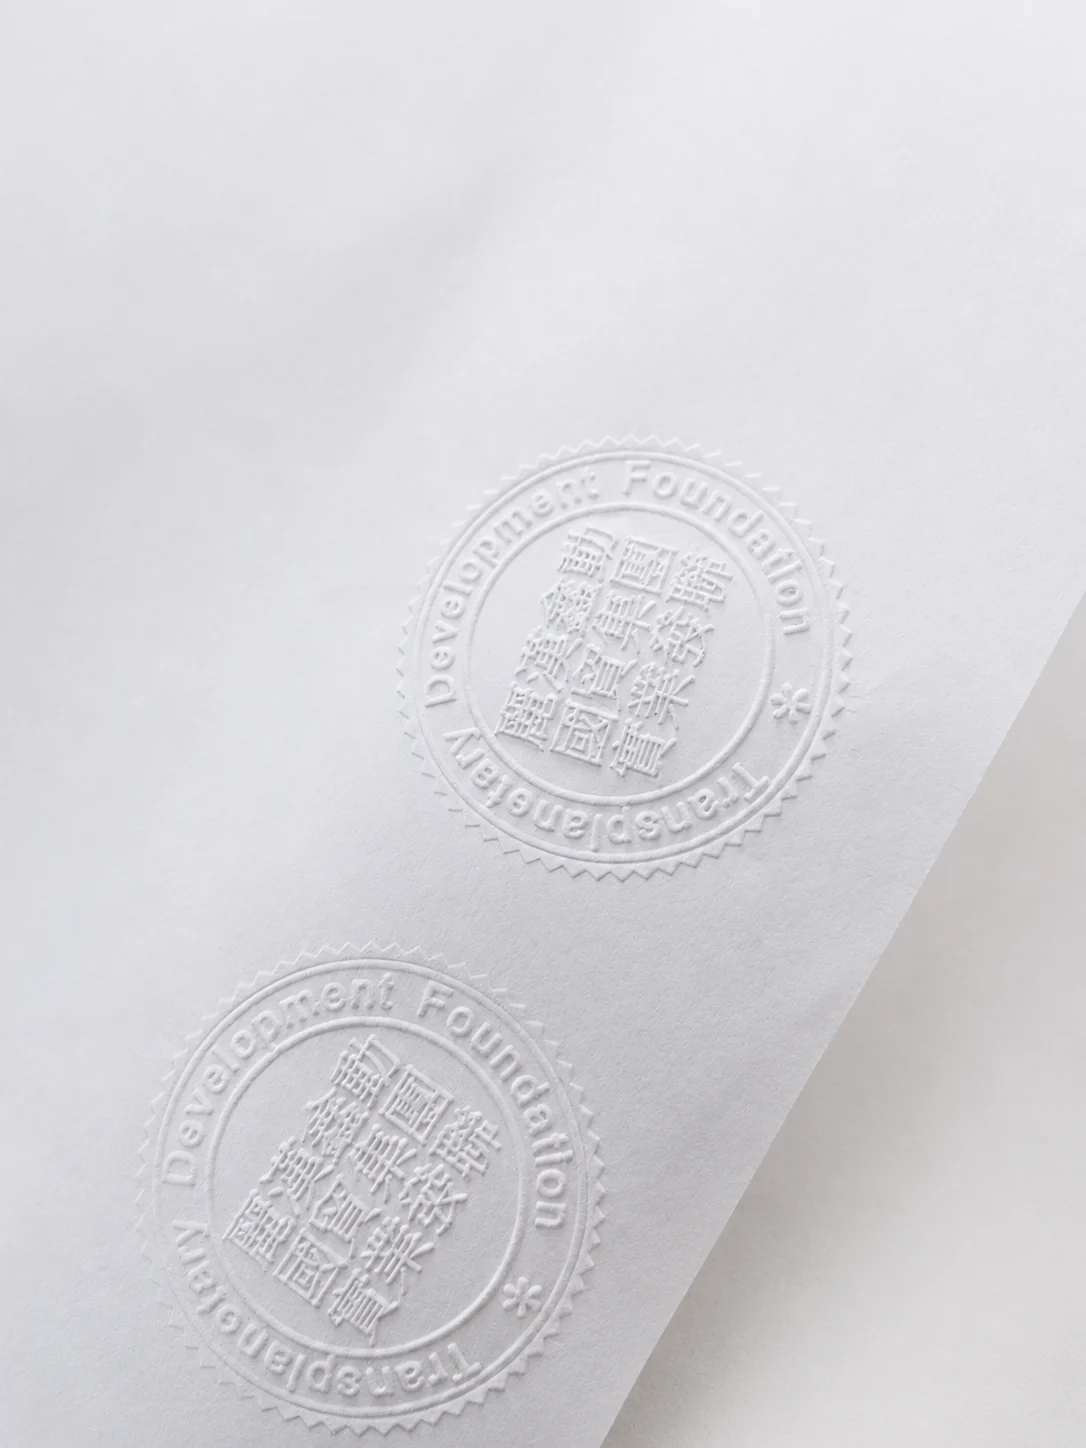
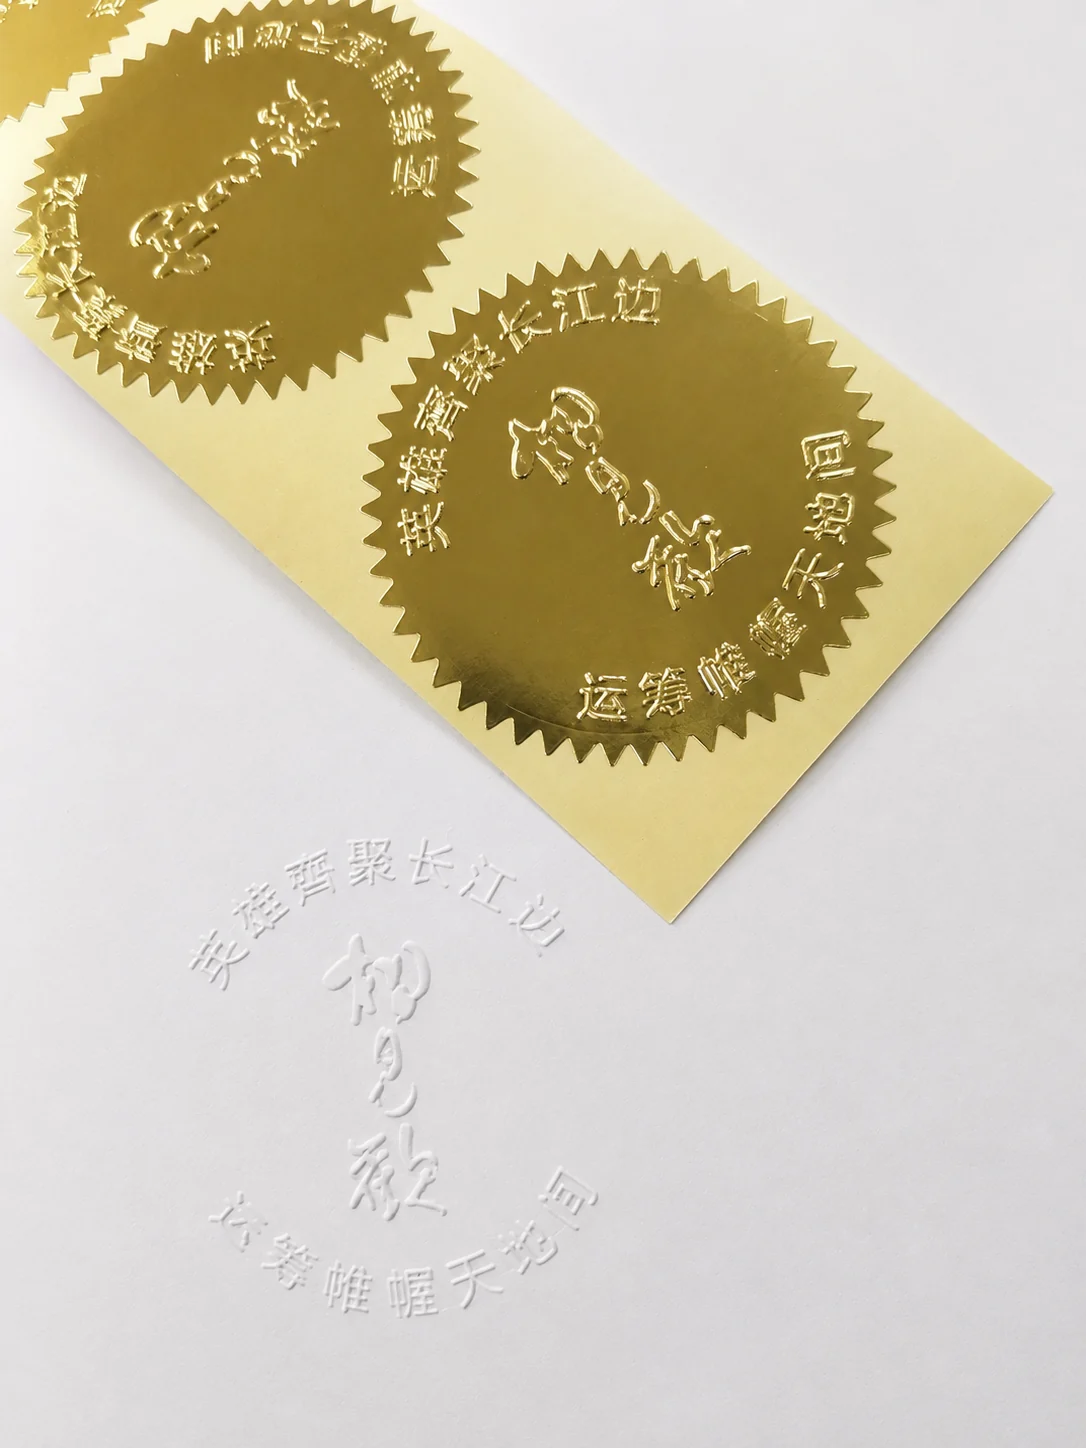
The prepared artwork is ultimately evaluated by the actual embossed result. What matters is not only how the design looks on screen, but how clearly it performs after physical embossing.
PAIRED DIE SYSTEM
Male and Female Dies Must Work as a Matched Pair
An embosser does not rely on a single engraved plate. The finished impression is created by a matched male and female die pair working together.
The geometry, orientation and registration of the two components must correspond correctly so that the paper can form between them during pressing.
A successful design therefore treats the male and female components as one system from the beginning.
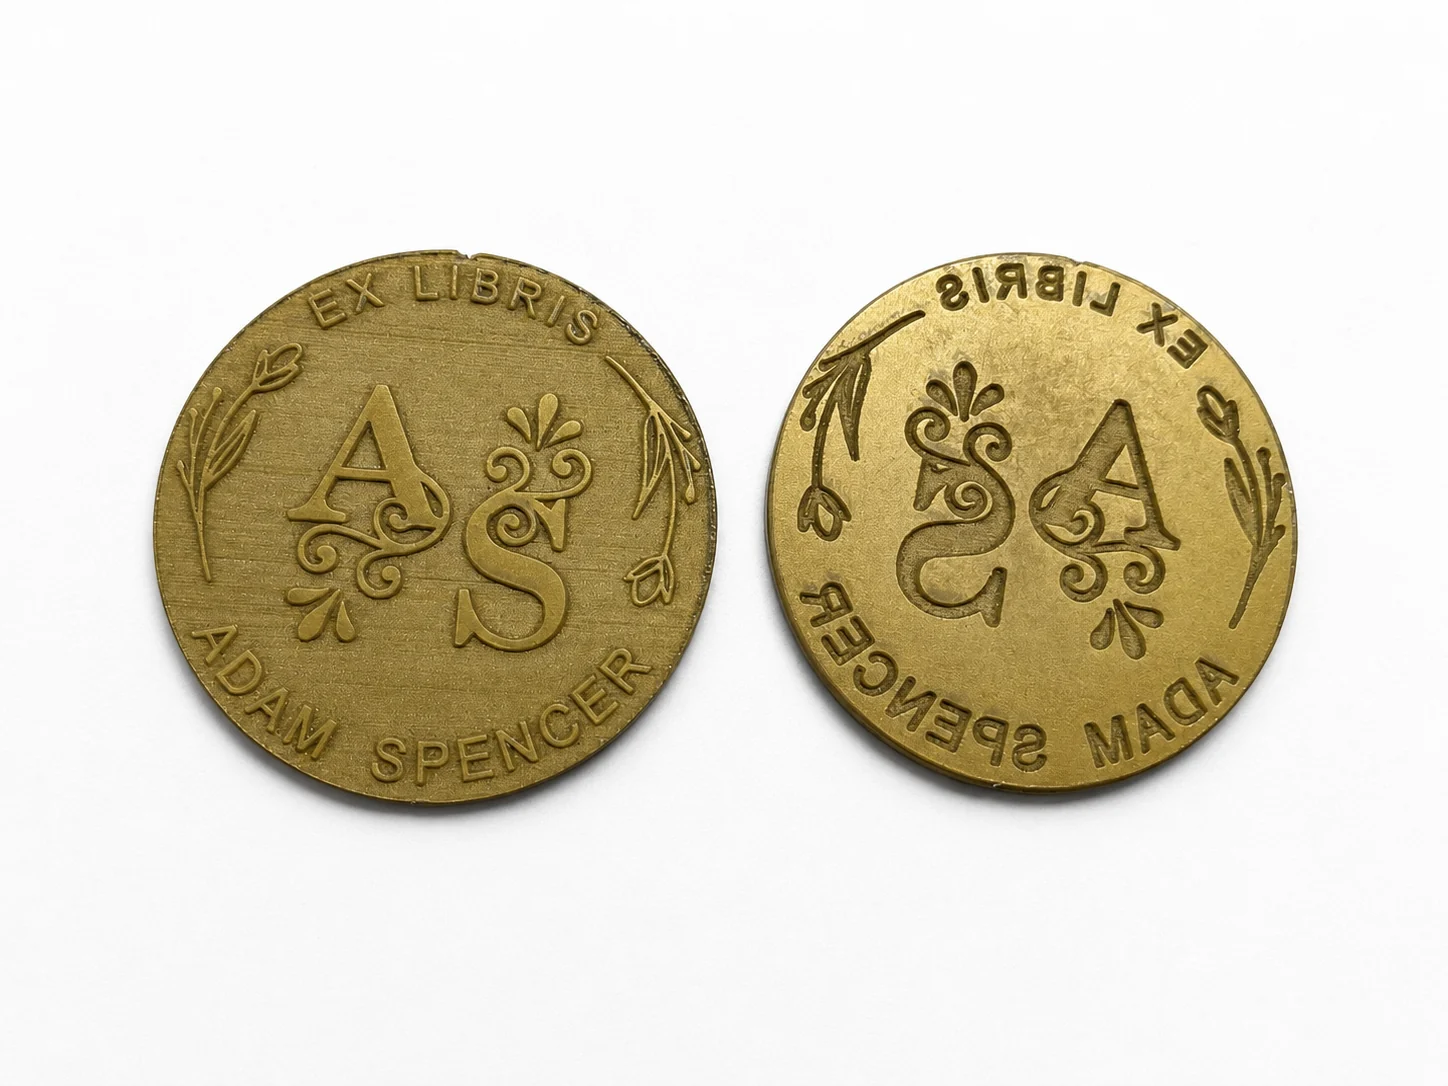
MALE DIE
42 mm Male POM Die
FEMALE DIE
42 mm Female POM Die
The two components are designed and processed as one matched die set.
RELIEF DESIGN
Why Relief Geometry Matters
Engraving depth alone does not determine whether an embosser die will produce a good result. The shape of the relief also matters.
Important design considerations include:
- Relief height
- Edge geometry
- Spacing between design elements
- The relationship between male and female features
- The transition between raised and recessed areas
The objective is to create geometry that forms the paper clearly while avoiding unnecessarily sharp or overcrowded features.
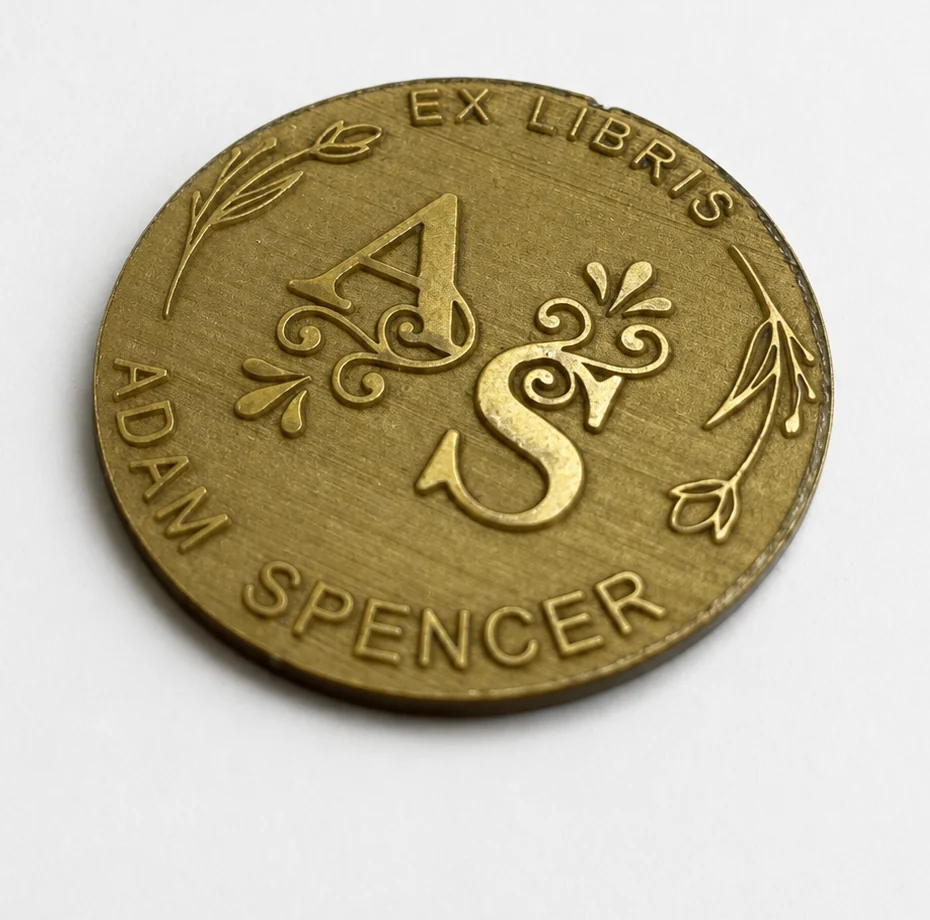
SIDEWALL GEOMETRY
Sloped Relief Sidewalls for Paper Embossing
In XLH Laser’s POM embosser die workflow, the engraved relief can form sloped or tapered sidewalls rather than an excessively sharp vertical transition.
For paper embossing, this type of relief geometry helps the paper transition into the embossed form more gradually during pressing.
The purpose is not simply to engrave as deeply as possible. The relief profile must work together with the matching die, the paper and the embosser hardware.
DETAIL CONTROL
Keep Fine Details Under Control
Computer artwork can be viewed at almost any magnification, but a physical embosser die may be only a few centimeters across. Details must therefore be evaluated at the actual die size and through the final embossed result.
Very Fine Lines
Extremely fine lines may look clear on screen but can lose definition after they are converted into physical relief and embossed into paper.
Small Text
Small lettering should be evaluated at the actual die size rather than at high screen magnification.
Dense Detail
Closely spaced design elements may visually merge after embossing, especially in smaller die formats.
Large Solid Areas
Large filled areas behave differently from fine-line artwork and may require different consideration of die geometry, pressure and paper deformation.
PRACTICAL ALIGNMENT
Use a Reference Notch for Reliable Die Alignment
Correct alignment between the male and female dies is essential before the pair is installed in the embosser.
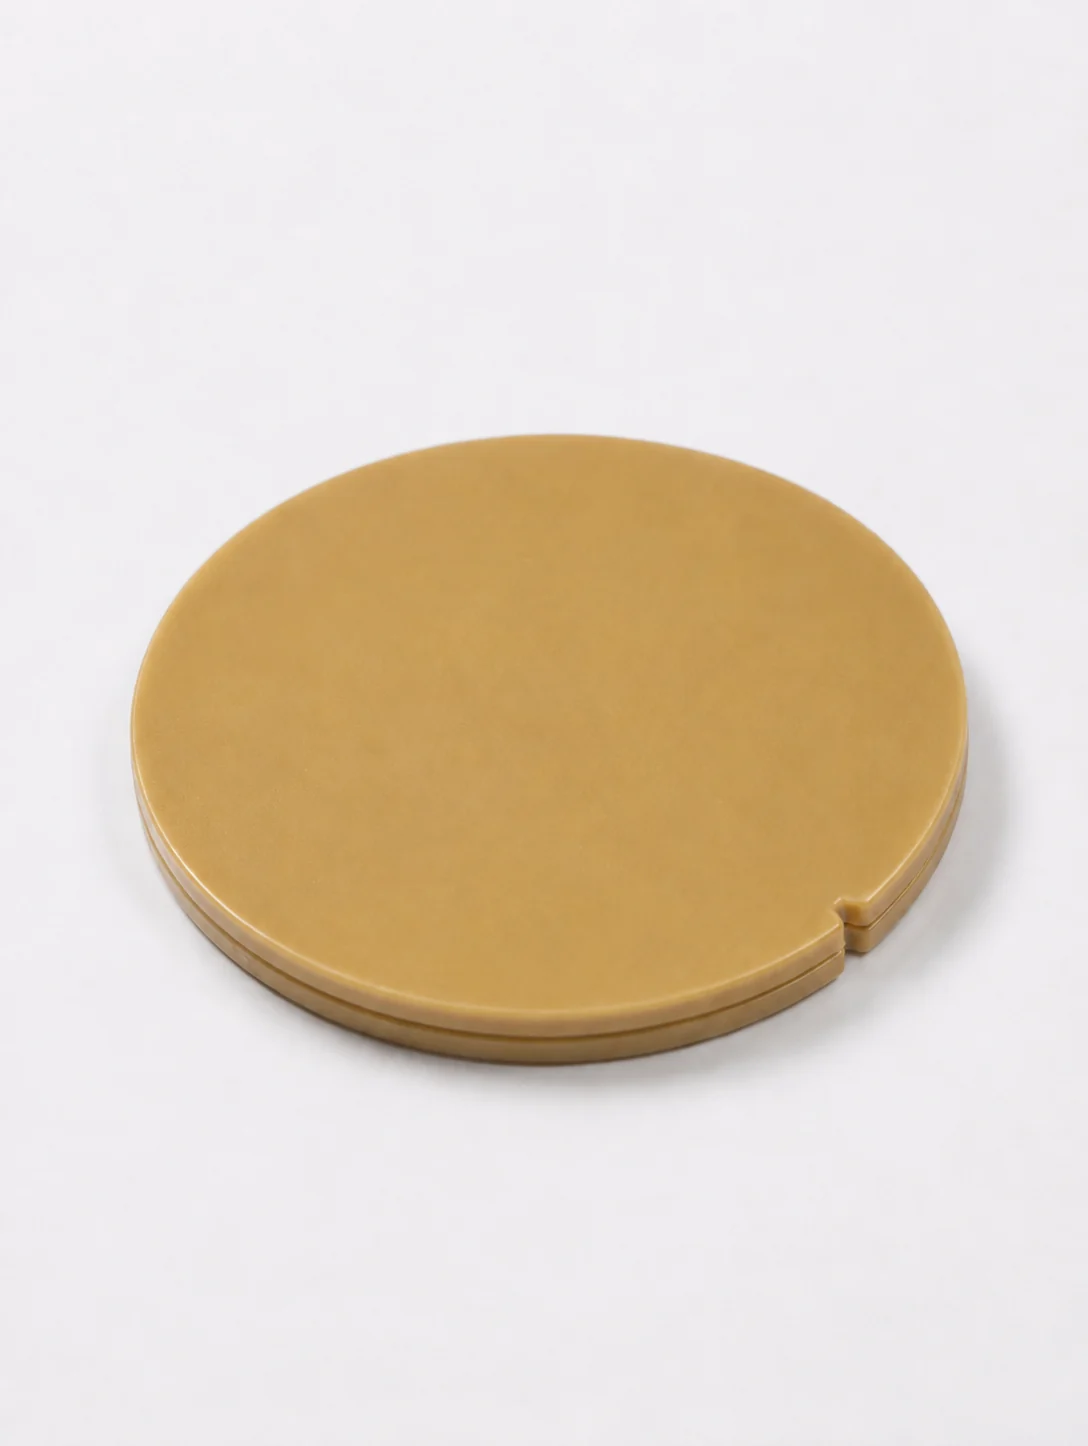
In the XLH Laser workflow, a small reference notch can be included in the die outline during digital preparation and cutting.
The matching notch on both components provides a simple visual reference for orientation and alignment during assembly.
DIE FORMATS
Common Embosser Die Sizes and Formats
The same design principles can be applied to different die formats according to the embosser hardware and artwork requirements.
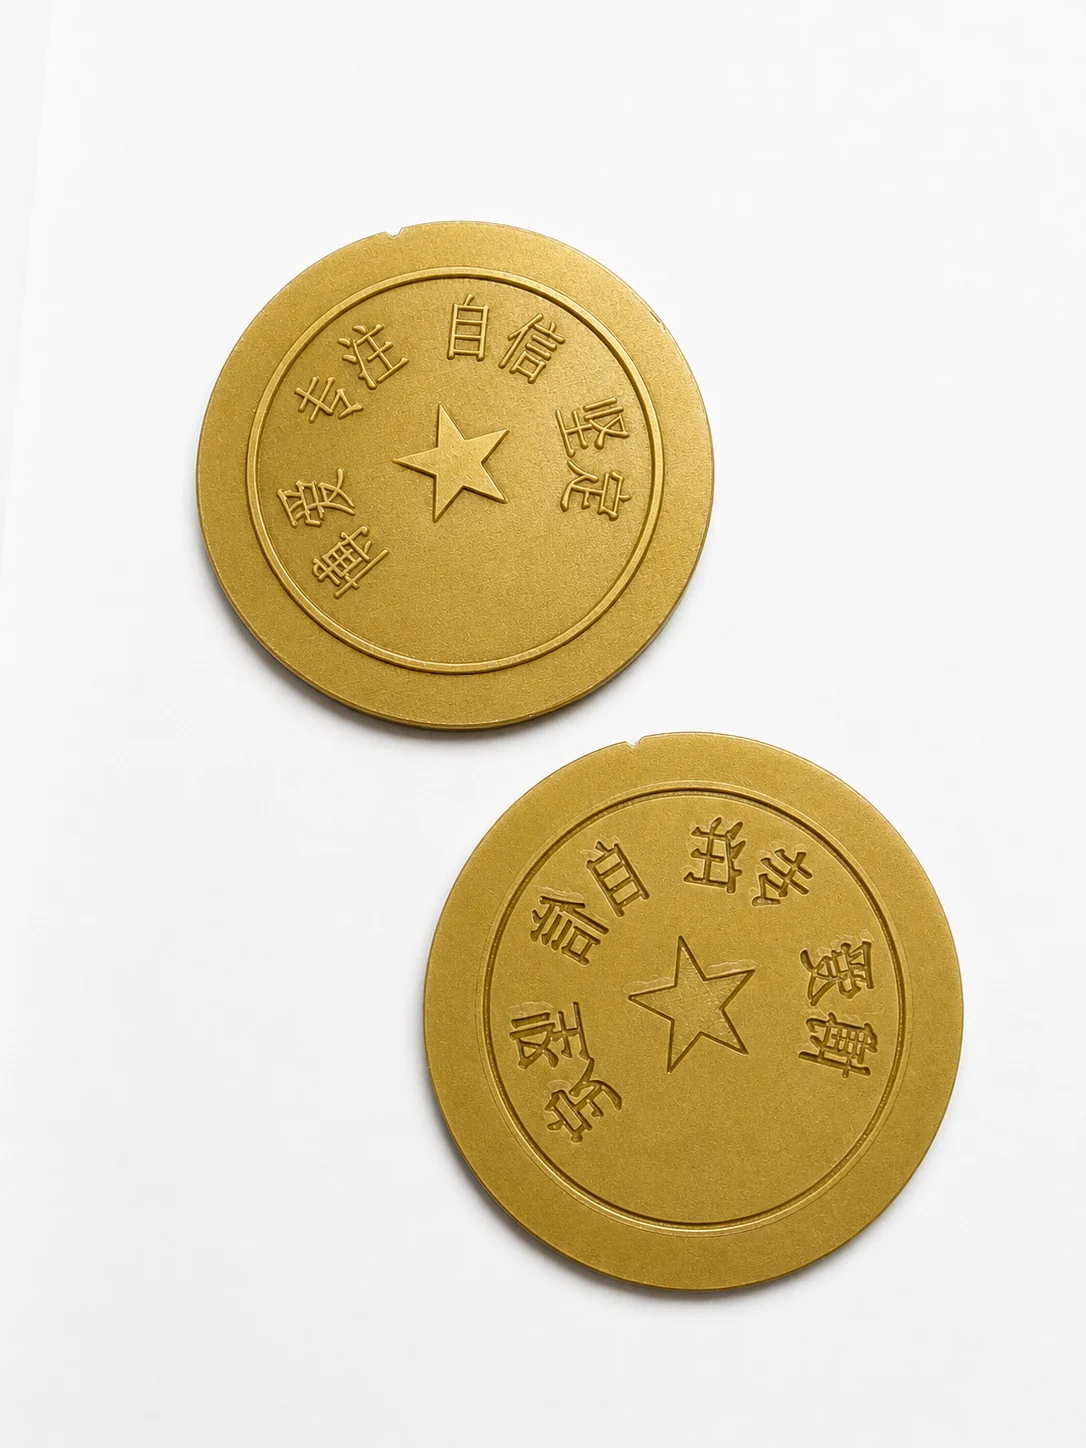
42 mm Round
A commonly used round format for customized logos, EX LIBRIS designs, names and decorative artwork.
50 mm Round
A larger round format providing additional space for artwork and text.
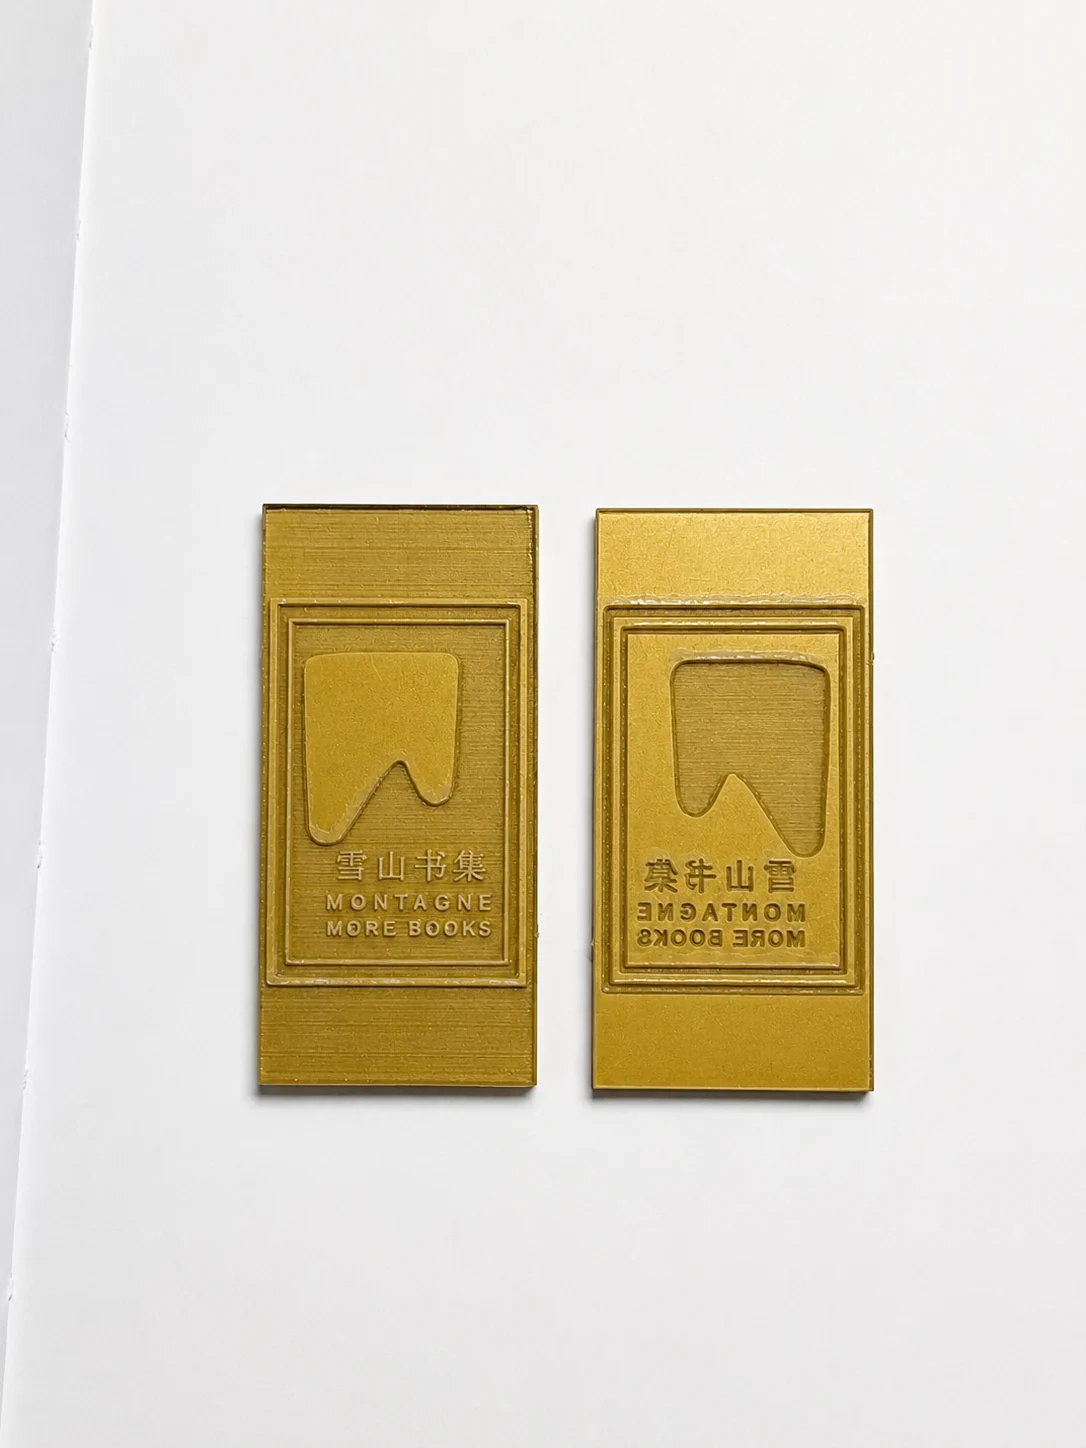
50 × 30 mm Rectangular
A rectangular format for logos, text and artwork that do not fit naturally within a circular layout.
These are examples from XLH Laser production workflows. The appropriate die size and format depend on the embosser hardware and customer artwork.
DESIGN VERIFICATION
From Artwork to a Finished Embossing Result
A design is verified through the complete physical workflow—not at the screen or laser stage alone.
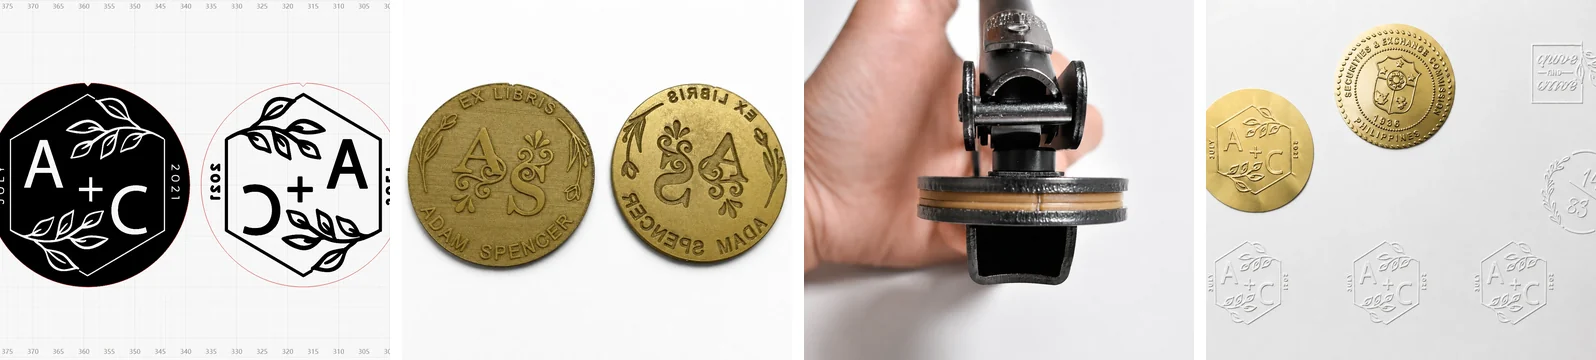
Prepare clean artwork for the intended die format.
Convert the design into corresponding male and female POM die components.
Align and install the die set in the embosser hardware.
Verify clarity, detail and registration through an actual embossing test.
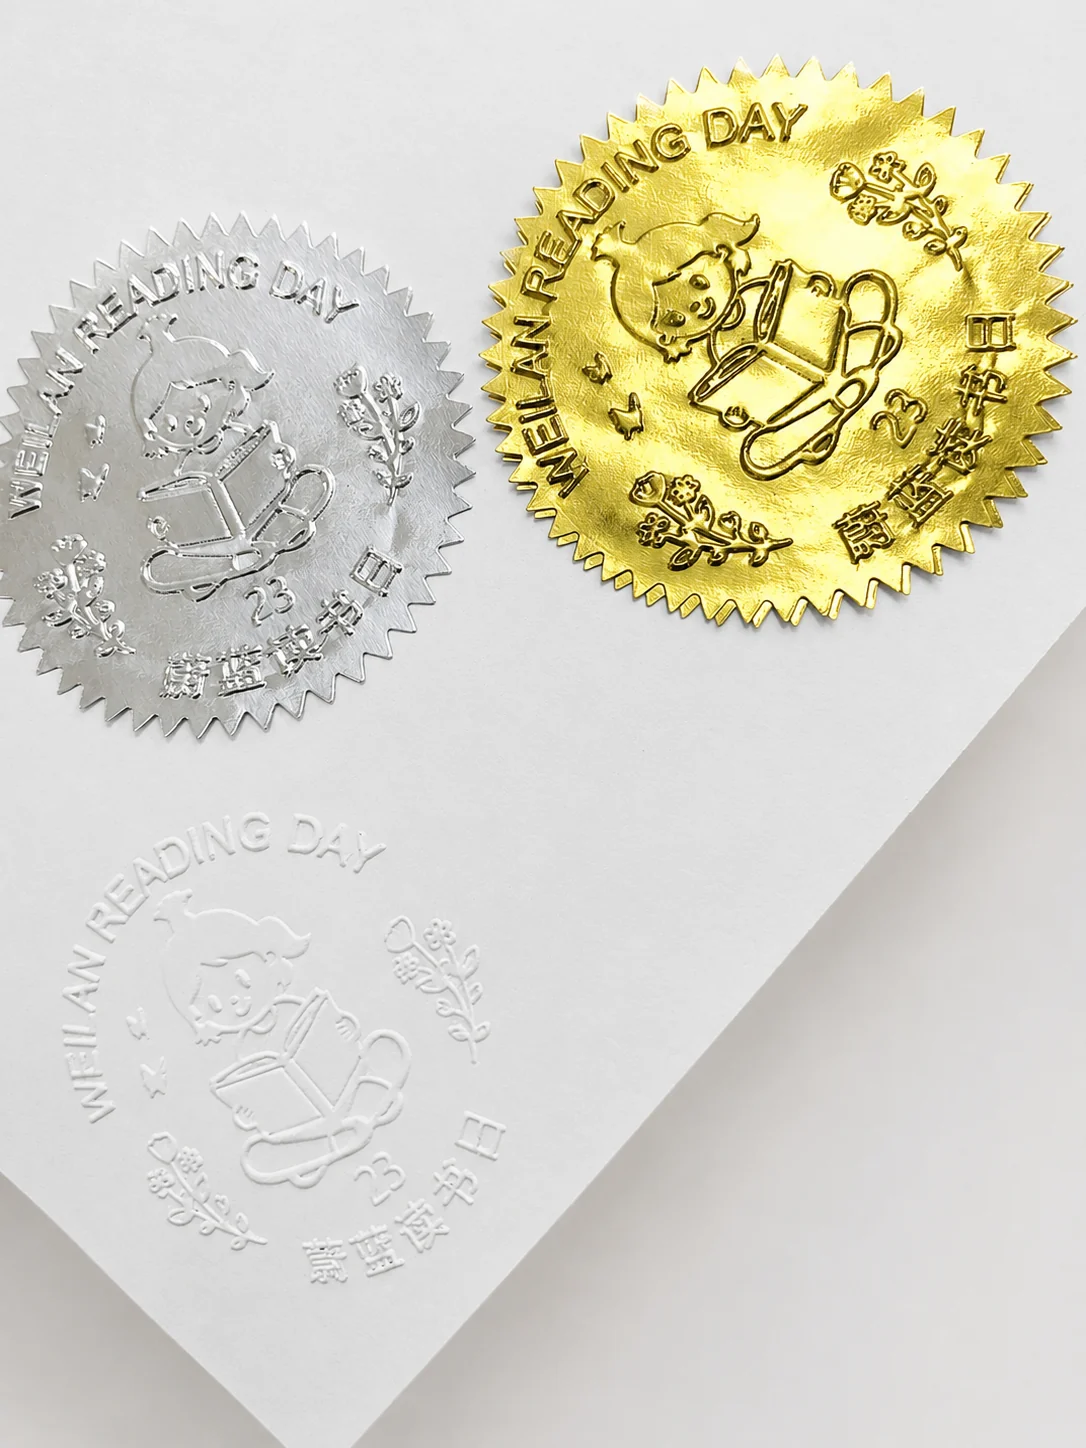
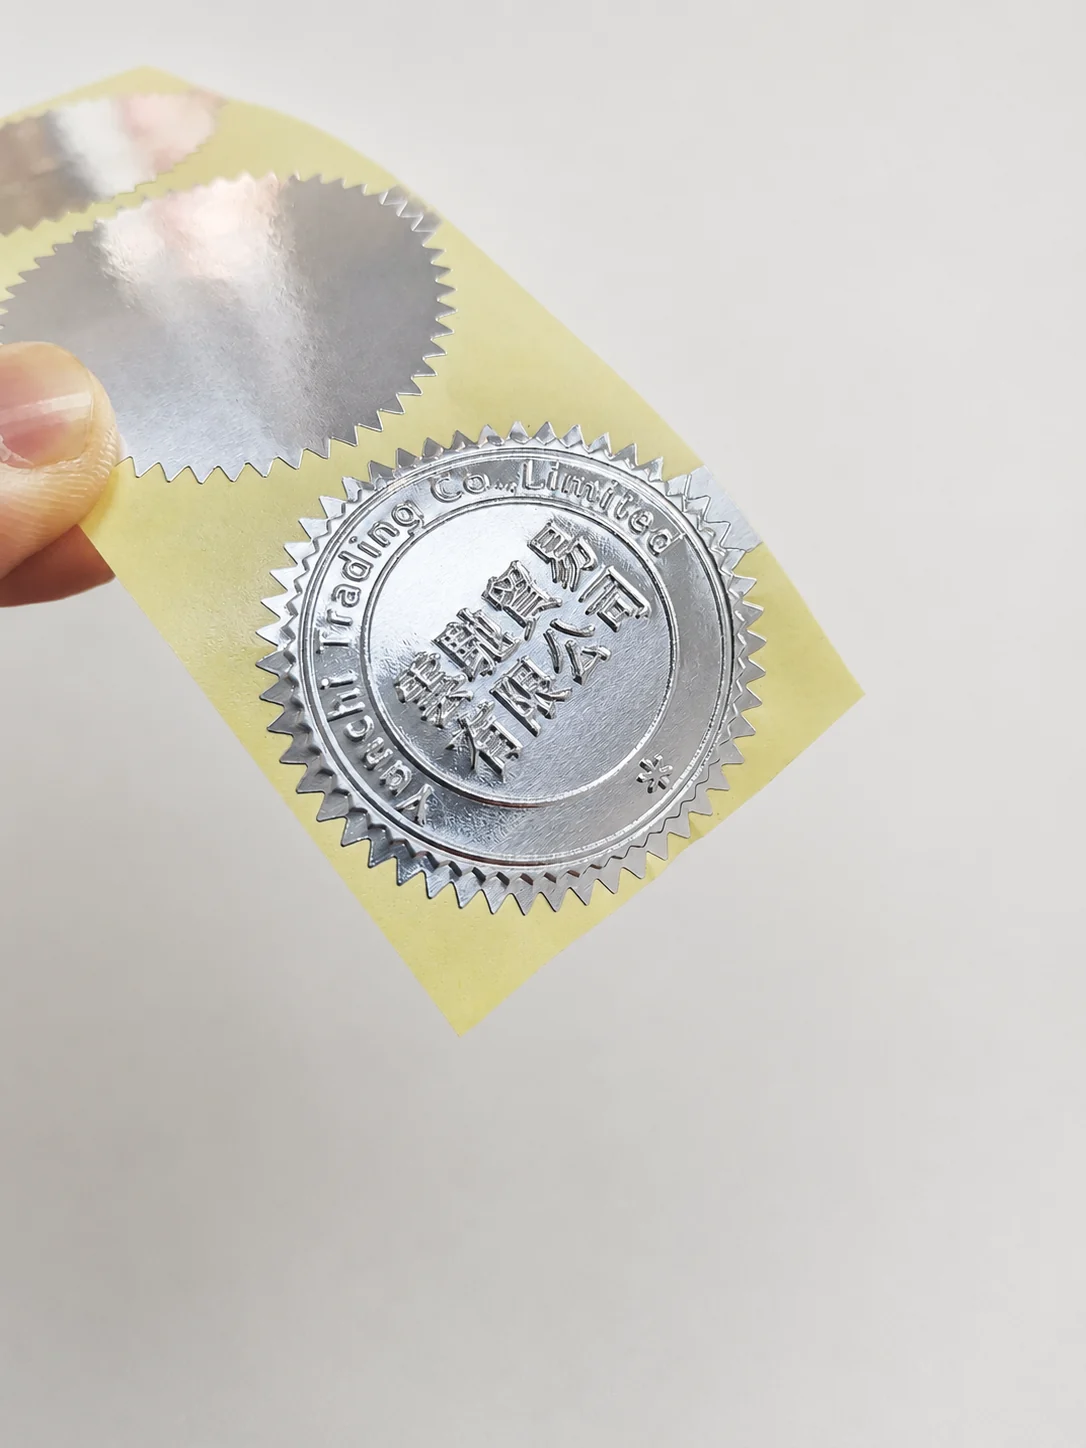
REAL EMBOSSING RESULTS
Different Artwork Requires Different Design Decisions
Different artwork places different demands on the die geometry. Text, thin decorative elements, dense logos and larger solid areas should all be evaluated according to the actual die size and final embossing result.
DESIGN REVIEW
Common Artwork Problems to Avoid
Too Much Fine Detail
Artwork that looks highly detailed on screen may become visually crowded after it is reduced to the physical die size.
Lines That Are Too Fine
Very fine elements can lose definition when they are converted into relief and pressed into paper.
Text That Is Too Small
Lettering must be judged at the actual die dimensions rather than at an enlarged screen view.
Crowded Spacing
Insufficient spacing between design elements can reduce visual separation after embossing.
Ignoring Male / Female Registration
The two components should be designed as one matched system rather than as two unrelated plates.
Skipping the Test Impression
A finished laser job is not the final proof of a successful design. The actual embossed impression should be verified before treating the design as production-ready.
BEFORE PRODUCTION
Embosser Die Design Checklist
A production-ready embosser design must work not only as digital artwork, but as part of the complete physical die and embossing system.
COMPLETE SYSTEM
Design, Material and Equipment Work Together
XLH Laser does not treat artwork design, POM material and laser processing as independent problems.
A repeatable production workflow requires the design, material, equipment, die geometry and final application to work together.
Production Workflow
How to Make Embosser Dies →CO₂ Laser System
DF60D CO₂ Laser →Die Material
POM Embosser Die Material →FAQ
Frequently Asked Questions
What type of artwork is best for an embosser die?
Clear black-and-white artwork is generally the most practical starting point for XLH Laser’s POM embosser die workflow. The design should focus on elements that can remain clear when converted into physical relief and pressed into the target material.
Do embosser dies need both a male and female component?
Yes. The embossing system uses a matched male and female die pair that works together to form the final impression.
Why are very fine details difficult to emboss?
Very fine lines, small text and densely packed elements may lose definition when converted into physical relief or pressed into paper. The final die size and actual embossing result should be considered during artwork preparation.
Does deeper engraving always create a better embosser die?
No. Engraving depth is only one part of die design. Relief geometry, spacing, male and female matching, material behavior and the final embossing result also matter.
Why does relief sidewall geometry matter?
The transition between raised and recessed areas affects how the paper forms during pressing. Sloped or tapered relief can help the paper transition into the embossed shape more gradually than an excessively sharp relief transition.
Can sloped relief prevent the paper from being cut?
Relief geometry can help reduce the tendency for sharp transitions to damage the paper, but the final result also depends on the artwork, die geometry, paper, alignment and embosser setup. It should be verified through an actual embossing test.
How are male and female dies aligned?
XLH Laser can include a matching reference notch in the die outline. The notch provides a simple orientation reference when the two die components are aligned before installation.
What die sizes can XLH Laser produce?
The website shows examples including 42 mm round, 50 mm round and 50 × 30 mm rectangular formats. The appropriate size and shape depend on the embosser hardware and customer artwork.
Can I send a logo or artwork for evaluation?
Yes. Customers can provide a logo, name, EX LIBRIS design or other artwork for review together with the intended die size and embosser application.
What material does XLH Laser use for these dies?
XLH Laser uses gold-colored POM sheet material in its demonstrated CO₂ laser embosser die workflow. See POM Embosser Die Material.
What machine is used to produce the POM dies?
XLH Laser uses the DF60D 60W CO₂ laser as part of its demonstrated POM embosser die production workflow. View the DF60D CO₂ Laser.
ARTWORK REVIEW
Need Help Preparing an Embosser Die Design?
If you have a logo, name, EX LIBRIS design or custom artwork for an embosser, XLH Laser can help evaluate the design together with the intended die size, POM material and embosser configuration.
The objective is not simply to reproduce the computer file. The objective is to prepare artwork that can produce a clear and usable physical embossing result.
View POM Embosser Die Material →